The default WordPress theme in 2014 was Twenty Fifteen, a template with a fixed sidebar to the left that turns into a header in mobile view, a minimal footer area, great typography, and a nice featured image area. Since then we've seen the release of TwentySixteen, TwentySeventeen, TwentyEighteen, TwentyNineteen and the current defualt free theme TwentyTwenty.
These themes are awesome, they go through a whole process to get to be chosen as the default WordPress theme, however, we can understand that users still want to customize it and make it their own.
Since these themes typically offer some limitations such as a single sidebar (which is called widget-ready area in WordPress) we will show you how to add a widget to the footer or how to tweak the code of any theme to add more widget areas to a theme.
Adding a widget area to the TwentyFifteen to TwentyTwenty footer is not different from adding a widget area in most WordPress themes.
If you're interested to see other WordPress themes, we'd recommend looking at such other popular themes as Divi from Elegant Themes. Check out our full review here.
{autotoc}

Create a WordPress Child Theme
When customizing a WordPress theme’s template files to create a widget area, it’s good practice to create a child theme.
The concept of a child theme is quite straightforward - we don't want to break the possibility of upgrading the theme to any newly released versions.
When creating customizations to a child theme, your modifications will be added to the child theme rather than to the original theme. When an updated version of the original theme is out, you’ll be able to update your copy of the original theme and leave your changes intact in the child theme.
If you're looking to learn more tips and tricks related to WordPress, visit the rest of the section on CollectiveRay.
1. Create Child Theme directory and files
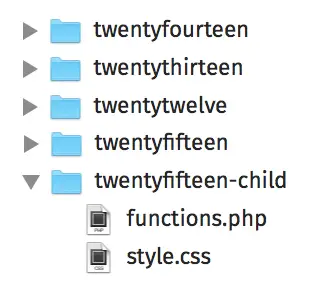
As a first step, create a folder inside the wp-content > themes folder. Call the folder twentyfifteen-child, twentytwenty-child. It is important that the child theme follows the naming convention of the parent them though.
So if the parent is called twentyfifteen, the child must be called twentyfifteen-child. Likewise, if the theme you're customizing is called twentytwenty, the child theme needs to be called twentytwenty-child.
Once you've created the child theme, you need to create two additional files.
The file that will be used to perform changes in the CSS styles should be called style.css. We also need the functions.php file for the child theme, where we can add certain features required.
These two files go inside the twentyfifteen-child folder or respective folder you have created for the child theme.

2. Add the file for the WordPress widget area (in the footer or where you prefer)
Because the widget area is to be added to the theme footer, you need to have a file for the footer code.
The safest way to code a WordPress template file is to start from a ready-made template, then add what you want and/or delete what you don’t want.
In this case, take the footer.php from the Twenty Fifteen theme, or the Twenty Twenty theme or whatever the theme you are customizing is called and paste it into your child theme.
3. Add Code to the Child Theme’s Files to create the widget
Right now, we only have empty files, so as it is, the child theme can't do anything.
For us to be able to effect changes, a working child theme needs some comments at the top of style.css. Open style.css in your favourite code editor and add this bit of code.
/*Theme Name: Twenty Fifteen ChildTheme URI: http://example.com/twenty-fifteen-child/Description: Twenty Fifteen Child ThemeAuthor: John DoeAuthor URI: http://example.comTemplate: twentyfifteenVersion: 1.0.0License: GNU General Public License v2 or laterLicense URI: http://www.gnu.org/licenses/gpl-2.0.htmlTags: light, dark, two-columns, right-sidebar, responsive-layout, accessibility-readyText Domain: twentyfifteenchild*/
The really important part here is in the Template so in the above example, it is Template: twentyfifteen. This is instructing WordPress about the name of the parent theme.
Ensure that the name is exactly the same as the parent theme’s folder name (letter case, or any spaces, dashes, underscores, etc. are important: everything has to match exactly the parent theme’s folder name).
Next, open functions.php and add the following bit of code.
While this step is not strictly mandatory, it is highly recommended because with this code the child theme will inherit the look and feel of its parent.
So let's write a function that hooks into the wp_enqueue_scripts() action hook. Inside the function you enqueue the parent theme’s stylesheet using the wp_enqueue_style() function.
This ensures that the child theme inherits its parent’s styles while overriding any specific style rule in its own style.css file.
<?php
//Import parent styles the right way and add other stylesheets if necessary.
function twenty_fifteen_child_styles() {
  wp_enqueue_style( 'parent-style', get_template_directory_uri().'/style.css' );
}
add_action( 'wp_enqueue_scripts', 'twenty_fifteen_child_styles' );
Your child theme is mostly done!
Access the Themes panel in your WordPress installation and you should see your Twenty Fifteen Child theme ready for use. Click Activate and visit your site. It should look exactly the same as the parent theme.
Adding the Widget Area
Now we need to add the code to define the footer widget area. Here’s the snippet that goes into functions.php.
/**
 * Register footer widget area.
 *
 * @since Twenty Fifteen Child 1.0
 *
 * @link https://codex.wordpress.org/Function_Reference/register_sidebar
 */
function twentyfifteen_child_widgets_init() {
  register_sidebar( array(
    'name'          => __( 'Footer Widgets', 'twenty-fifteen-child' ),
    'id'            => 'sidebar-2',
    'description'   => __( 'Add widgets here to appear in your footer area.', 'twenty-fifteen-child' ),
    'before_widget' => '<aside id="%1$s" class="widget %2$s">',
    'after_widget'  => '</aside>',
    'before_title'  => '<h2 class="widget-title">',
    'after_title'   => '</h2>',
  ) );
}
add_action( 'widgets_init', 'twentyfifteen_child_widgets_init' );
The code above adds a function that registers a sidebar with the ID of sidebar-2 (the Twenty Fifteen theme already has a sidebar with the ID of sidebar-1), and then hooks this function into the widgets_init() action hook.
Next, let’s go ahead and add the new sidebar to the footer. Open footer.php in a code editor and enter this snippet just below this line of code: <footer id="colophon" class="site-footer" role="contentinfo">.
<?php if ( is_active_sidebar( 'sidebar-2' )  ) : ?>

 <div class="widget-area" role="complementary">

  <?php dynamic_sidebar( 'sidebar-2' ); ?>

 </div>

<?php endif; ?>
The code above first checks if the sidebar-2 has any widgets, if so it displays the sidebar inside a div with the class "widget-area".
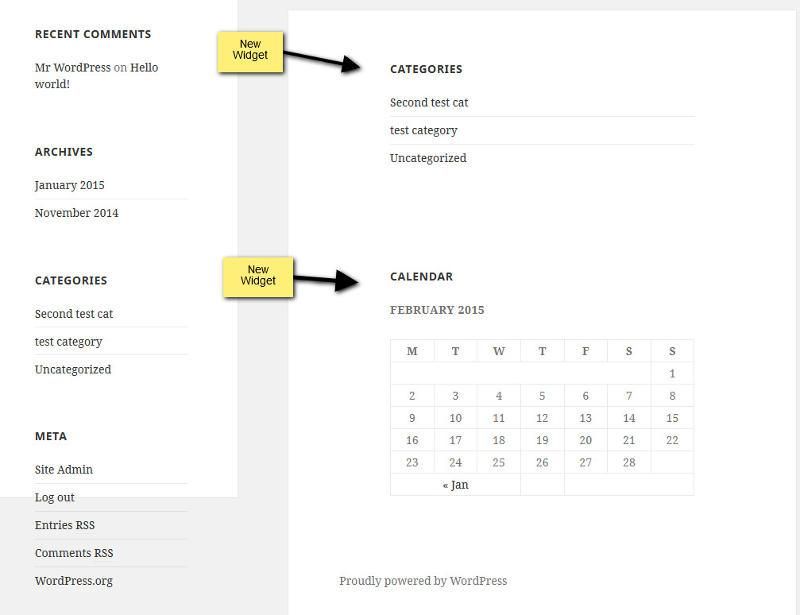
The next thing you need to do is to head over to the Widgets panel of your WordPress back-end, locate the Footer Widgets sidebar, and add some widgets to it. Save the widgets as you add them and check the result.

The above shows a couple of widgets on the Twenty Fifteen Child footer sidebar and you can see that text was too close to the top of the container and the widgets’ bottom margin was too high. This little snippet in style.css will improve the appearance considerably.
.site-footer .widget {
  margin: 0;
  padding: 10% 20% 0;
}
.site-footer .widget:last-child {
  margin-bottom: 10%;
}
Here is another example of adding another sidebar:
if ( is_active_sidebar( 'sidebar-2' )
  || is_active_sidebar( 'sidebar-3' ) ) :
?>
  <aside class="widget-area" role="complementary" aria-label="<?php esc_attr_e( 'Footer', 'twentyseventeen' ); ?>">
    <?php
      if ( is_active_sidebar( 'sidebar-2' ) ) { ?>
        <div class="widget-column footer-widget-1">
          <?php dynamic_sidebar( 'sidebar-2' ); ?>
        </div> <?php }
      if ( is_active_sidebar( 'sidebar-3' ) ) { ?>
        <div class="widget-column footer-widget-2">
          <?php dynamic_sidebar( 'sidebar-3' ); ?>
        </div>
    <?php } ?>
The code you need to use will depend on the theme you are using in reality.
Your WordPress footer widget is done!
In this post, we've seen how to add a new widget area to the Twenty Fifteen WordPress theme footer. Although we placed the widget area in the theme’s footer, you can use this logic to add widget areas pretty much everywhere in a theme by following similar steps.

