If you've heard about WordPress, you probably would want to know how to go about building a new WordPress site from scratch, and in reality, how to start a blog. It's not VERY difficult, but we wanted to guide you through all the actual steps, not just the installation but the whole actual procedure from having nothing, to having a complete functional, fully working, optimized WordPress website.
So you want to start a blog? You probably have heard about how entertaining blogging can be but don’t know where to begin? Want to try monetising your hobby or interest with a blog? If you answered yes to any of those questions, this guide is for you!
We have been blogging for over 15 years in various capacities. A couple of us are professional bloggers. We will pour everything we know and have learned over the years into this guide. The intention is to provide you with the knowledge and tools you need to start your very own blog.
We will guide you every step of the way.
From coming up with a cool name to setting up web hosting. From installing and configuring WordPress to designing a publishing schedule and how to come up with ideas for blog posts.
We will even include securing your blog, improving it with WordPress plugins, monitoring SEO and performance and how to spread the word of your new blog through social media.
A complete guide to how to start a blog! But in simple, easy to follow steps :-)
Before we get to the good stuff, buying a domain and setting up, you should first do some planning.
Planning may not be as cool as setting up a website, it can help you avoid wasting time and money on things you don’t need. It will also help you decide if blogging is for you long term or not.
Plan your blog
Don’t worry, a blog plan isn’t too complicated. All you need is a sheet of paper and a list. On that list you want to add these questions:
- What is my blog going to be about?
- Who is likely to want to read it?
- Why would they want to read it?
- Who is this target audience? How old are they? Where do they live?
- How much competition is in my niche?
- How will I be different?
- What technology will I use to run the blog?
You should plan to answer all of these questions before you do anything else. You need the answers before you start your blog if you are to have any chance of success.
Many bloggers have figured things out as they went along but wasted a lot of time and money while they did it.
We don’t want that to happen to you.
1. Decide on a niche
The next step in planning your blog is to decide what you’re going to write about.
- What are your interests?
- What do you want to achieve?
- Do you have a hobby you want to write about?
- Political views?
- Social views?
- Expertise you want to share?
All make perfectly viable topics for a blog.
Remember, the more leftfield or specialist your niche, the smaller your target audience is going to be. This is no bad thing but should be remembered in order to set your expectations about what you’re going to achieve.
A blog about South American butterflies is not going to attract the same kind of readership as Fortnite gaming tips.
One niche is no better or worse than the other, it will just attract a different size and type of audience.
You do need to be aware of the following though: popular niches and subjects are bound to be more competitive, so making it in these industries will be harder and a longer-term goal.
Smaller niches are easier to dominate, but the return could be smaller.
The following niches are incredibly competitive:
- Travel
- Fashion
- Beauty
- Tech / Software
- Personal Finance
- Gaming / Gambling
- Health
- Pets
Anything that is popular, is bound to be very competitive. However, if you still want to go for a competitive niche, we would suggest you choose a very specific vertical. Let's say instead of focusing on "dogs", focus on a very specific breed, maybe the one that you own. Or a specific breed within a certain condition.
That narrows down your audience, but the audience will then be highly tuned to your content.
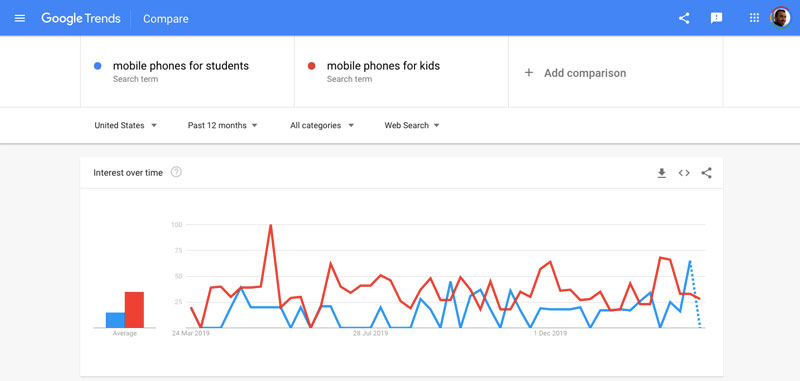
Even in terms of tech, instead of focusing on "mobile phones", you could choose to focus on "mobile phones for kids with learning difficulties". The audience will be smaller, but the intent will be much higher.
You can do this for pretty much any niche. Go for a very specific vertical and your life will be easier. However, don't get TOO specific, because your audience could get too small.
You can also use such tools as Google Trends to check whether a specific niche is growing or in decline over the months/years.
2. Competition analysis
Competition analysis is about seeing what other websites and blogs are out there that cover your niche. You’re interested for two reasons.
- To see what and how they blog so you can do it better.
- To potentially collaborate with them to share links and resources.
The internet is full of millions of websites all vying for attention and you should definitely begin by seeing how the market leaders are doing.
- Perform a web search on the niche you’re planning to blog about.
- Read as much of their site as you can.
- Identify and record things you really like and things you know you could do better.
- Repeat for the top 10 web search results.
Use this knowledge to begin planning your own blog. Include the elements you really like and think would perform well. Also include those things you know you could do better as those will differentiate you from that competition.
Finally, note down anything they have missed that you could add. This could be anything that offers genuine value to the reader.
When you set up a blog, you have to either be better, smarter, funnier, more entertaining or more viable as an information source than others in your niche. Competition analysis is how you can decide exactly what you’re going to compete on.
3. Audience analysis
Audience analysis is about understanding who will be reading your blog. In marketing, we create personas for the audience to help us understand them.
- Who are they?
- How old are they?
- What do they do for a living?
- What kind of newspapers/online magazines or websites are they likely to visit?
- What do they want from a blog?
- What type of content will they appreciate most?
All those questions and more can be answered by creating audience personas. You don’t have to go all-in here. A few notes about the type of person likely to read your blog could suffice.
You just need enough to help you decide what to talk about, how to talk and what to include in your blog.

Creating personas can be fun but there is a serious side. Your writing style and topics you cover will need to have the audience in mind at all times. You may be writing for you, but it isn’t about you.
It’s about your audience.
Everything you write on your blog has to have a single goal in mind. To offer genuine value to the reader. Everything else is secondary to that.
That statement above is incredibly important. You have no idea how many new blog launches we come across where the owner is writing purely for themselves and not for the audience reading it. Needless to say, they never last long!
We don’t want you to be one of those.
Below those initial persona questions, you need to answer one more fundamental question.
- How often will I write blog posts?
This will feed into your publishing schedule.
4. Setting expectations and a schedule
People are habitual animals.
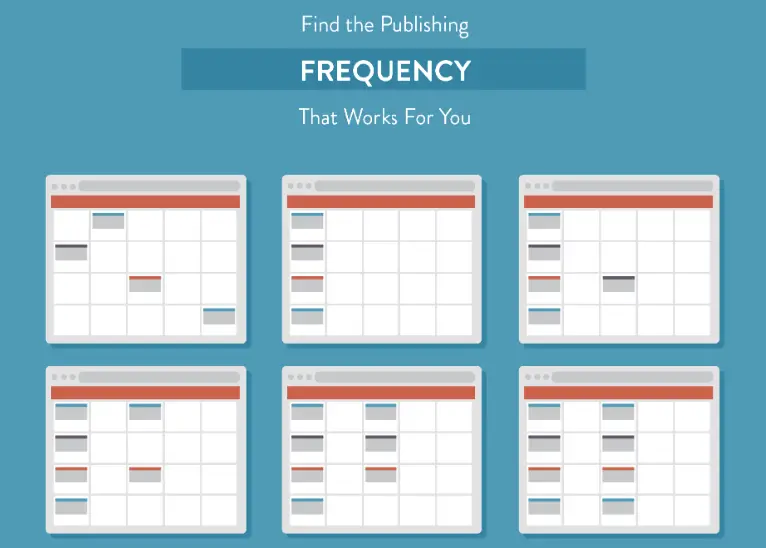
We get ourselves into routines whether we notice or not and blogging is exactly the same. If our favourite websites release posts every afternoon, we begin to expect them to appear every afternoon. If they release Monday and Thursdays, we expect them every Monday and Thursday.
We all know what happens if something fails our expectations.
If you fail to deliver when the audience expects you to it will become disappointed. They then begin looking elsewhere for entertainment. Your audience may forgive a missed post or two if you are entertaining enough, but miss any more and there are millions of other blogs out there they can turn to!
This point cannot be overstated if you want to blog for a living.
Once you begin gaining an audience, you need to commit to them. Publish on a set schedule every day or week as you see fit. Stick to that schedule as much as humanly possible and never, ever make a promise you cannot keep.
You can add supplementary posts as and when you want but make sure you have those main posts to deliver on the audience’s expectations.
5. What technology to use for your blog
The final element of your plan is to decide what technology you’re going to use to host your blog. You can use WordPress, Joomla, Drupal CMS, use a custom CMS or custom platform if that’s your niche, or you could use something else entirely.
If you’re starting your first blog, we would suggest using WordPress. It is free. Most web hosts can set it up for you, it is easy to get to grips with, there are lots of learning resources online, themes are cheap and there are thousands of plugins you can use to make your blog faster and better.

You don’t have to choose WordPress. You can choose whatever you like. As WordPress powers around a third of the internet, the rest of this guide will assume you will be using it.
Now the planning is over with, let’s get on with the fun part. Actually starting your blog! The next section will focus on specific actions on how to start a blog.
How To Start a Blog
Let's get started, simple steps first but we'll cover everything as we go along.
1. Buy a domain
The domain is the website name. For example, our domain is www.collectiveray.com.
Have you bought the domain you want already?
If not, then now is the time to think about naming your blog.

Choose your domain name wisely as it will be how people recognise you online. Choose something that is fairly easy to remember by your target audience, ideally in a domain which maybe is already familiar with your target demographic.
Before you actually purchase a domain, make sure you think long and hard about the actual domain you're getting. It should be something that conveys the purpose of your blog as much as possible and should ideally be planned for the long-term.
There are a few guidelines we use when coming up with good domain names:
- Make them short and memorable.
- Avoid hyphens and special characters wherever possible.
- Remember that they will be how people know you online so choose words carefully.
- Stick to top-level domains (TLDs) at first. You can always expand later.
- Double-check the spelling before you buy!
If you're stuck for ideas, there are good domain name generators that can help you find a creative solution, particularly if you're looking for a domain name in the highly populated .com space.
One of the tips above was to buy a top-level domain (TLD) first. These include .com, .co.uk, .net, .org and so on. These carry the most authority online and every new blog should begin with a TLD.
If you want to add a different name and point it towards your main domain, you can. Ever since the market was opened up, you can secure almost any word as a domain suffix, including .ninja, .expert, .phone and almost any word you can think of.
These domains don’t carry as much authority online as yet which is why we would suggest using those as well as a .com or .net and not instead of. People do not yet trust .ninja enough to be confident in a website with that kind of suffix.
You can point as many domain names as you like to your primary one but we wouldn’t recommend adding more than one or two to avoid confusing users. As long as your main domain name is a .com, .co.uk, .net, .org or other TLD, you’re all good.
Once you've thought about it and made a decision, you’re ready to purchase your domain.
Before you buy, there is one consideration you might like to make. You can buy a domain name separately from web hosting or you can buy them at the same time. For beginners, we suggest buying the domain and web hosting at the same time as they will be set up to work automatically for you.
Buying a domain separately from hosting means you will manually have to configure the name from one host to point to another. It isn’t difficult but can be a little confusing at first. Buying the two together makes better sense if you’re starting your very first blog.
The only time we would suggest buying the two separately is if you buy a domain name from an auction or the web host you use has super-cheap hosting but charges silly money for domain names. In every other situation, we recommend buying the domain and hosting as a package.
It's now time to starting thinking about where to host your website.
(You might want to check out our other WordPress articles in the menu above.)
2. Get your WordPress hosting sorted
To put a website online, you need a web host. These are companies that rent out space on servers connected directly to the internet. Without a web host, nobody will be able to visit your website and it won’t be visible to search engines.
There are hundreds of web hosts out there and some are better than others. Read reviews, check prices, check reliability, check what support each offers and make an informed decision about which web host you want to work with.
You can check out some of our hosting reviews here.
To begin with, the cheaper shared hosting should be sufficient. Once you begin gathering a readership in the many thousands, you may want to look at getting a Virtual Private Server, or dedicated hosting.
It's a good idea to choose a web host that specializes in WordPress. There are many out there and we encourage you to research as many as you can.
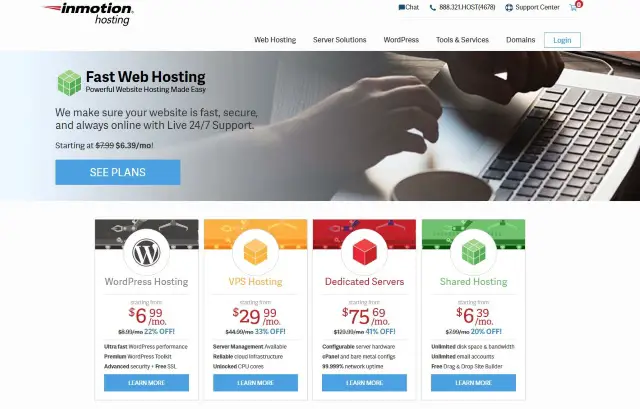
We choose to use InMotion for a number of reasons:
- InMotion hosting is specifically optimized for WordPress. A WordPress site on InMotion is fast.
- WordPress sites hosted on InMotion are secure. Besides auto-updates, many of the normal weaknesses of WordPress are specifically negated by InMotion.
- InMotion have a lot of WordPress support gurus. If we have any questions, they sort it out quickly.
Give InMotion a shout, they'll be happy to give you a full 90-day money-back guarantee and CollectiveRay visitors will get 47% off. This is a limited time offer, so grab it while you can.
Get hosting at 47% off until January 2026
Other web hosts are available. WordPress.com is also a good option for getting started.
3. Get a domain or create a sub-domain for your blog
In all likelihood, your host will be using CPanel to manage the hosting service. If you choose a package that allows you to host a single website, then you're already done.
If you are hosting on a service that allows you to create multiple websites, you'll probably need to add either a subdomain or an add-on domain. An add-on domain is a brand new domain such as https://www.collectiveray.com, whilst a sub-domain would be something like awesomeness.collectiveray.com.
This isn’t something a newcomer to WordPress would typically need to worry about but it is useful to know.

4. Link the domain to the hosting
Remember we mentioned buying the domain and hosting at the same time or separately? If you bought them separately, you will need to link the domain to your host. It will create the "link" between the domain you purchased and the hosting server you buy.
This is done via DNS. (read more about DNS here)
Essentially, this is done via the name server functionality of the domain you have bought. Within the domain dashboard there should be an option called Name Servers or Manage DNS. It is here you will need to specify the nameservers for the domain.
The nameserver(s) are owned by the web host. You should see the specific nameservers in your receipt or setup instructions from the host. Copy the nameserver names from your web host and paste it into the nameserver section in your domain dashboard.
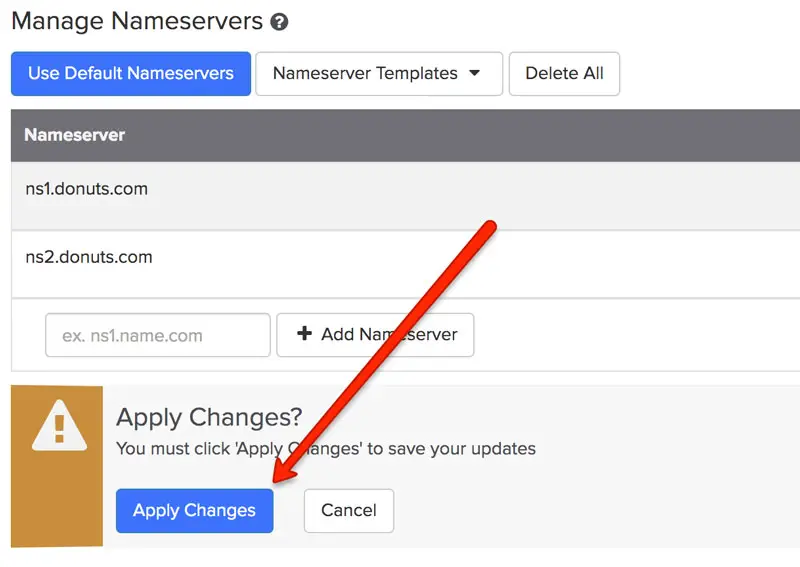
Save your changes and the new name should point to your web host within 24 hours.
As a breakdown, the steps are:
- Log into the dashboard of the website where you bought your domain name.
- Find the nameserver or DNS section.
- Log into your web host’s dashboard and find the nameservers.
- Copy the host’s nameservers into your domain dashboard where it says nameservers.
- Save the changes on your domain dashboard.
Now you know why we suggested it is easier to buy the domain and hosting from the same company!
Some users won't be running just a single website on their hosting.
Particularly if you are a web designer or an agency, you're probably going to need plenty of storage. Many hosting accounts will offer an unlimited amount of storage, however it all depends on the actual hosting account you go for.
(While they say it is unlimited storage, it isn't truly unlimited, there are fair use policies in place that will actually limit the storage to a sensible amount)
Many times, you will be able to find hosting companies who can provide you with an account with "unlimited storage". You should compare and contrast and see what suits your needs before you make the ultimate decision. Particularly if you are an agency, you wouldn't want to transfer tens or hundreds of sites, so consider carefully before you make a final decision.
5. Prepare the WordPress source files
Now that we have configured the domain and have secured hosting, it is time to set up WordPress.
Some web hosts have special systems that will install WordPress for you. If your web host has this function, use it. Using the built-in system is far easier than manually uploading WordPress, although you can do it if you like.
Here’s how:
How to Manually Install WordPress
While we are going to share with you most of the steps, if you get stuck at any point, you can follow these specific instructions directly from the wordpress.org website.
Acquire the latest source files for WordPress by visiting https://wordpress.org/download/ and download the latest version of WordPress. Once you've downloaded the files, you'll need to upload these files to the hosting server which you've bought in the previous steps (do not decompress the files yet).
The easiest way is usually to simply use the File Manager function in your hosting control panel. Many web hosts use CPanel which makes short work of uploading files. You can log into CPanel, select File Manager, select the public_html folder of your domain and upload WordPress to it.
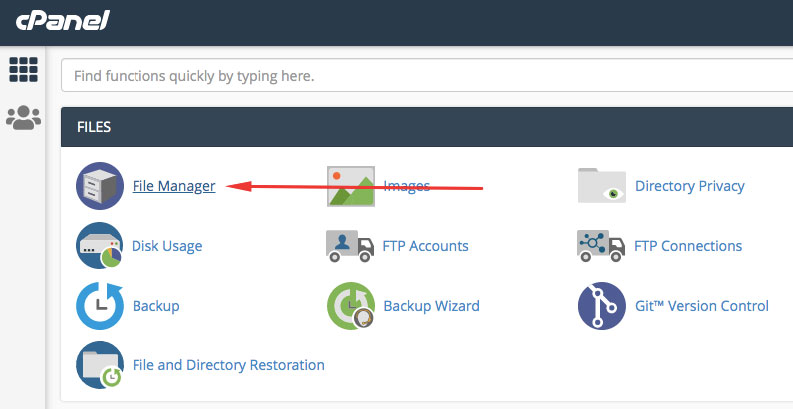
Alternatively, you can do this by accessing your server via an FTP program and uploading the zip file you have just downloaded.
Make sure you upload the file to the public_html folder as there might be other folders. If you want your WordPress website to live in www.yourdomain.com upload the file to public_html.
If you want to have a subfolder, create a folder with the name of the subfolder you want in public_html, and upload it to that folder.
For example, if you want to install a new WordPress named MyStory, create a folder named MyStory in public_html, and upload the file to this folder. Your new WordPress installation would then be created in www.yourdomain.com/MyStory.
Once you've uploaded the zip file, your File Manager should also provide you with the functionality to expand the zipped file via the Extract function. Click on the WordPress zip file and click Extract to uncompress the zipped file now.

Why have we opted to extract it now? Well, it takes much less time and effort to upload a single zipped folder rather than several hundred files via FTP.
6. Prepare the (MySQL) database for your new WordPress installation
WordPress is a CMS that uses a database to control and manage all content. The database uses MySQL to store data and is queried every time you make a change, add content or someone reads a page.
The database also stores configuration and setup information, including settings, which plugins are installed, their configuration, pages, orders, or anything else that your site requires to function.
Databases are created in one of two ways.
- They are created automatically for you during installation.
- Or you can create them manually through your web host.
We definitely suggest using the WordPress installer as even experienced hands would rather not spend time messing around with databases!
Automatic database creation
When you install WordPress using automatic installation, you will set up a database as part of the process. You will be walked through the entire exercise and everything will be set up for you.
Once WordPress installs, you will be asked to name your website, add an email address and admin login and set up a database. Give the database a meaningful name and tell WordPress to use it. That’s all the setup it needs. The WordPress installer will handle everything else including linking the database to the website and ensuring all the correct tables are there.
We will cover this in more detail in a minute.
Manual WordPress database creation
If you elect to automatically create a database, you can skip this section and move right onto Installing WordPress.
Using the control panel of your websites’ hosting package, you should be able to create a database together with a username and password.
If you want the easier way, you probably should use the MySQL Database Wizard which allows you to create the database, user and give the user access to the database you have created in a number of steps after each other.
Make sure you make a note of the:
- Name of the MySQL database
- Name of the MySQL user and password of the user you have created
- Name of the MySQL server (this is specified during the creation of the database). It is usually localhost, but it might be different in some hosting servers.
The second way is to create the database and database user manually. If your host is using CPanel and uses MySQL, creating the database and the user are done as separate steps:
- You first create the database,
- Then add a new MySQL user, and
- Finally, grant access that user access to the MySQL database you have just created.
If these steps seem overwhelming or are a bit difficult for you to achieve by yourself most hosting sites will be able to create the database and user for you and give you all of the information you'll need.
While we typically refer to MySQL being a requirement, you'll find that there are several flavours of this database which can also work, such as MariaDB (which is a faster, enterprise-ready version of MySQL) and others. The vast majority of web hosts will use MySQL though as it’s free, reliable and fairly user-friendly.
7. Install WordPress
Once you have done all of the above preparations, installing WordPress should take just a couple of minutes. Access your domain and you should get a welcome page telling you what information you're going to need which are the following:
- Database name (the MySQL database you have created in Step 6)
- Username (the MySQL user you have created in Step 6)
- Password (the password for the MySQL user)
- The name of the database server host (usually localhost, or the name which was given to you whilst creating the database in step 6)
- Table prefix - this should be a couple of characters at random and an underscore, by default they are wp_
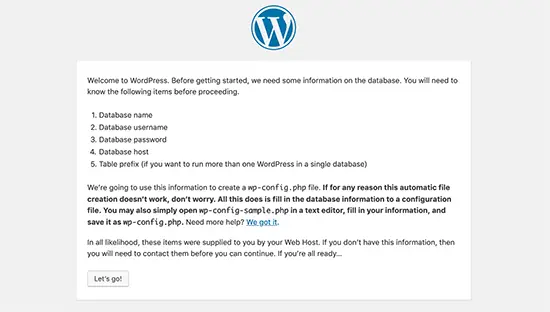
Once you have confirmed you have all the information from 1 to 4 above, press the "Let's Go" button. You'll now get a form which allows you to specify the information of the database.
Enter the information correctly and click the Submit button. You don't really have to worry too much about the table prefix, so if you don't understand what it does, just leave it as it is by default. Some versions of WordPress won’t even ask you this question so you might not even have to worry about it.
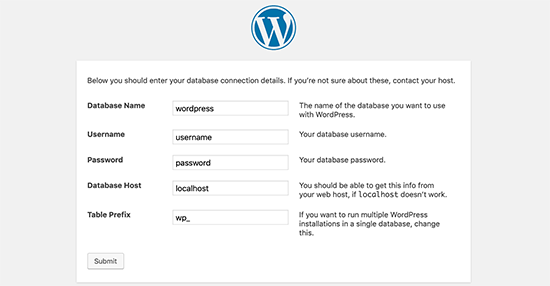
If WordPress is able to connect to the database, you'll get a nice message from WordPress saying it’s now about to run the installation of WordPress.

If you have specified a wrong piece of information to access the database, the WordPress installation is going to complain. You will likely see something along the lines of "Error establishing connection to the database". Make sure you have the correct information and try again.
Once you are able to perform the "Run the installation" step - your WordPress site is nearly ready. Just a final step of configuration and you'll be done! You should now be seeing a Welcome screen.
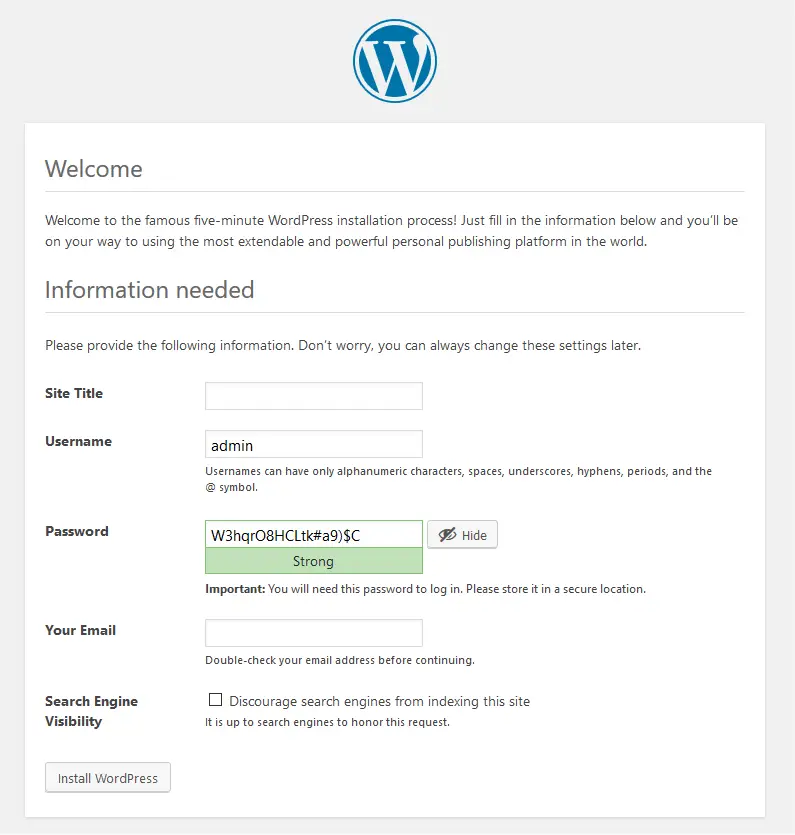
Here you can now enter some information about your new WordPress website installation.
- Site Title - give your WordPress website a name. Make it descriptive and either the same or similar to your domain name.
- Username and password - these are going to be used to access the administrative part of WordPress, so make sure you create a very strong password. The strength indicator will show you whether you have a good password or not.
If you want your website to survive the wild west of the internet, DO NOT use admin as the username and password. Make sure that the username and password are difficult to guess by somebody else but easy to remember by you.
WE like to use phrases, together with random characters. For example, the username could be 'fishingblogowner', and the password could be any random collection of characters or something which makes sense to you only: ‘Myf1rstb0ga0utf1shi1ng’ (my first blog about fishing with intentional misspellings). The stronger the better for both of these, as long as you can remember both of them!
You could also opt to store them on a secure password service such as LastPass.
Next, enter your email address for important notifications from your WordPress website.
Check the privacy options if you would like Google and other search engines to be able to access your website. You DO NOT want to discourage search engines from indexing this, so do not check the checkbox.
Once you've filled all the information, click on 'Install WordPress'.
And that's it. You should now have a new WordPress website!
You will now be redirected to the WordPress administration to enter your username and password so that you can start creating posts your content.
If you navigate to www.yourdomain.com in your browser, you should find a brand spanking new WordPress website with Hello World as the only entry. That’s the front end of your new blog!
8. Secure your blog
Now we have set up your blog, let us secure it. WordPress had a history of being easy to hack. That is mainly in the past but we still need to take precautions. Your website is directly connected to the internet so you need to protect it as much as possible.
There are two very basic things you need to do to make WordPress much more secure:
- Allow WordPress automatic updates. This ensures that if a security problem is discovered in your current version of WordPress, a new version will be installed when released and your website will no longer suffer from that problem.
- Make sure that your administrator username and password are not easy to guess. We've already highlighted this above, but we'll stress this again. Make sure the administrative users of your new WordPress website installation have a username which is NOT admin, and a password which is difficult to guess.
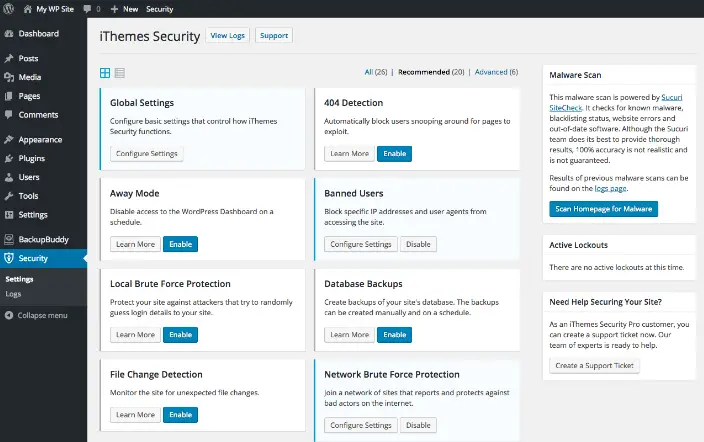
There are a number of free and premium security plugins for WordPress worth checking out. We have used Wordfence and some of the others and would recommend them to any WordPress user. You will be amazed at just how many hack attempts you will see in the activity logs!
If you want to take WordPress security further, this guide over at CollectiveRay goes into a lot of detail around securing your website.
9. Configure the basics
There are a few steps you really should do to make sure your new WordPress site is up and ready to go.
Make URLs searchable
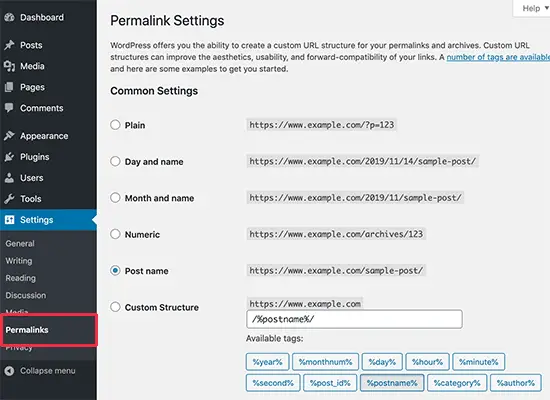
If you clicked on the Hello World post, and take a look at the address bar - you'll see that the address of the post isn't exactly ideal. It looks like www.yourdomain.com/?p=1. This how your posts would look if you did not change the default "Permalink" settings.
Navigate to the Permalinks section (Settings > Permalinks) and choose how you would like the address of your posts to look. There are various options you can choose, and choose the one you prefer as long as you change it from the Default.
We suggest using Post Name. This appends the title of the post to the URL and is the assumed default for SEO and usability.
Protect your site from comment spam
Website commenting is a tough one. On one hand, you want to encourage commenting as a blog is a conversation. On the other hand, there is so much comment spam and toxicity online, allowing commenting can be very hard work.
One way to allow commenting while minimizing spam is to use a couple of tools.
Fortunately, WordPress ships with Akismet, which is a comment spam protection service. You can also use the brilliant Jetpack which we have reviewed here as it also has a comment spam prevention feature.
If you're not ready to opt for Jetpack right now, you should at least set up Akismet.
First of all, choose whether you want comments or not, if you do not want any comments, head to Settings > Discussion and customize the options here to suit your needs. You can force users to register before they are able to post comments, or you can choose the disable comments completely.
Once you have done this, you should still configure Akismet.
Go to Plugins > Installed Plugins > and click on Activate for Akismet. Once you press Activate you'll get a huge button which shows you how to register and Akismet account, generate an API key and use this to protect your WordPress installation from comment spam
Alternatively, you could use a service like Disqus, a third-party comment plugin that can help control spam and toxicity.
Visit Jetpack for the best spam protection
Give your name a face - activate Gravatar
Gravatar is used by default in WordPress to display images on comments or wherever Gravat is enabled. Many themes also support Gravatar. You just need to associate your email to Gravatar once, and from then onwards, on your WordPress website or any site where Gravatar is enabled, your name will have a face.
This is purely optional but if you want to build an audience is one more way to encourage that two-way conversation.
Now your blog is ready - but if you want to create a blog that makes a hit, you'll need to make sure your theme is spot on. Using a default theme, or one which is not visually appealing, or does not offer certain functionality and features for your readers will create a bit of a barrier to your readers. We've done a lot of research to find some of the best WordPress themes you can use to power your brand new WordPress blog.
10. Choose an AWESOME blog theme!
Thought you were done with setting up your blog?
Strictly speaking, you are ready of course, but these steps will give your site a few things which it should have.
A theme is the design of your new WordPress installation. How it looks and feels. Everything your website visitors see will be controlled by the theme.
A few themes come installed with WordPress by default and there are literally thousands of third party themes that you can choose from. There are also thousands of WordPress themes for sale. We'd recommend that you choose one which reflects your personality or the reason you are creating a WordPress website in the first place.
What will make or break your WordPress website is very much dependent on what your website looks like. And the way to control what WordPress looks like is through themes.
Here's a little hint - do NOT use a free theme. Many times these are limited, basic and make your site look temporary. The themes included in WordPress are good for giving you an overview of what your blog will look like but we wouldn’t suggest using them for visitors.
Instead, check out one of our recommendations below or check a few WordPress theme roundups and reviews we've done. We've looked at individual themes and specific niches.
Do yourself a favour and pick up a premium WordPress theme to make your blog look its best. It's a worthwhile investment.
Recommended theme - Divi
We just mentioned that it makes sense for your business to opt for a premium theme. As this is a complete guide to setting up a blog, we're going to make a recommendation for the most amazing WP product ever - and our favorite theme by far, Divi.
Divi is a premium WordPress theme which has grown to become one of the most flexible products. Rather than offering a single theme, Divi offers the ability to use a multitude of themes or create your own truly unique theme. It supports various site layouts, including a personal blog, sites for various niches and industries and lots more.
Check out our Divi theme review.
Download Divi Now (with 10% OFF until January 2026)
Whether you want to use it to create a community, a blog, a single-page website or a mix of all of these, Divi has you covered. It is both a theme and a drag and drop page builder, you know that you can do absolutely anything you want with Divi.
Have a look at Divi, you'll not regret it. If you want to see what we really think of this theme, we've got a full Divi review here - don't forget to read our article here!
Astra
Astra is also an excellent WordPress theme. It is light, powerful and includes a range of excellent free and premium templates. No matter what your blog is about or who your target audience is, there will be a design within Astra to suit.
While powerful, Astra is also relatively easy to get to grips with. The dashboard uses simple navigation and instructions that enable you to fully customise your theme while keeping things sensible for beginners.
Hestia
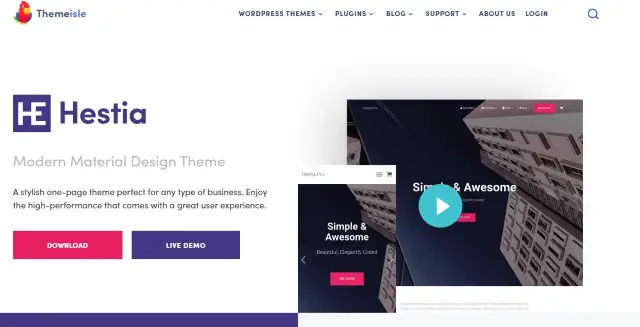
Hestia is another of our favourite WordPress themes. It is a fully responsive theme with powerful features, yet loads quickly and remains accessible to newcomers to WordPress.
It comes with its own customiser dashboard that makes short work of changing colours, fonts, navigation, images and layouts so you should end up with something truly unique.
Hesta works with WooCommerce for selling online and with a number of other plugins. Like these other themes, it should work for any industry, any brand and in any situation.
GeneratePress
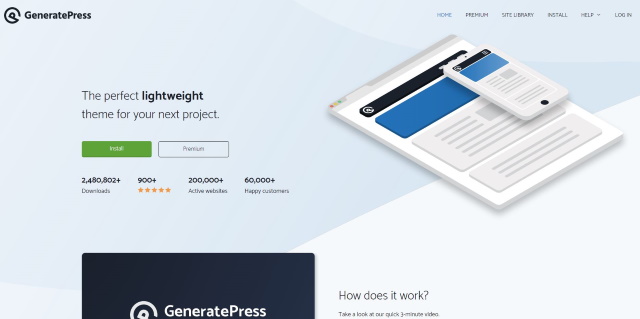
GeneratePress is another favourite of us here at CollectiveRay. It’s a lightweight WordPress theme that offers a very stable template with customisable design. It is so popular, it has been downloaded almost 2.5 million times!
GeneratePress loads quickly, can be as simple or as feature-rich as you need and is already SEO-optimized. It has no dependencies either, so no waiting for jQuery or other scripts to load. The theme uses its own JavaScript for superb performance.
OceanWP
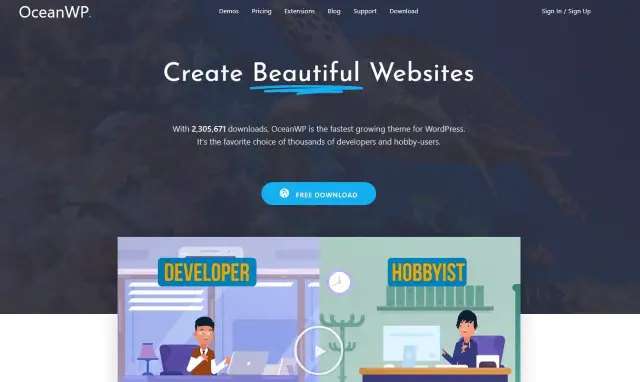
OceanWP is another option for your new blog. It’s a fully-inclusive WordPress theme that is fully responsive, loads quickly, is already SEO-optimized and works with WooCommerce and other plugins. It’s another template closing in on 2.5 million downloads and for very good reason.
OceanWP comes with a range of pre-built demo sites you can customize to your own needs and the ability to build your own. Flexibility is inherent in this theme which is why we recommend it.
Simply Pro
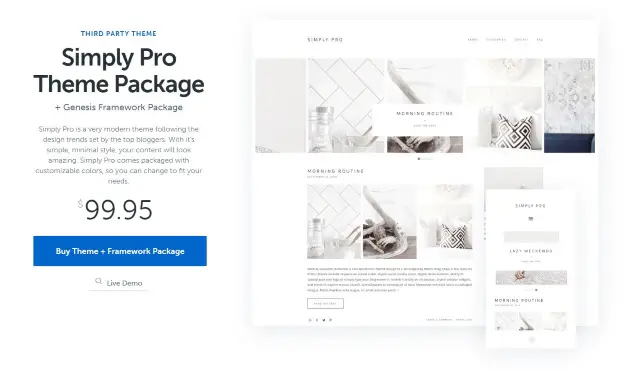
Simply Pro is a third party child theme for the very accomplished Genesis Framework. The Genesis Framework is a foundation that builds upon WordPress and allows a lot more freedom in terms of design. Child themes depend on Genesis Framework to function so the two go hand in hand.
Simply Pro is a very clean design that lends itself well to many types of blog. It’s modern, simple and works on any type of screen. It can load quickly and integrate a wide number of plugins too.
Elementor
No list of WordPress themes would be complete without mentioning Elementor. It isn’t a theme, more a page builder that opens the door to a unique blog design. You can use a pre-made template if you like or build your very own. The selection of templates is wide and contains some very professional-looking designs.
While we wouldn’t recommend using Genesis or Elementor for your very first blog, they are ideal for when you want to develop your skills.
target="_blank" href="https://www.collectiveray.com/out/tf_brixton" class="tracked nturl">Brixtons - Minimal Personal WordPress Blog theme
One of our favourite themes for a WP blog is Brixtons - News from the City.
target="_blank" a href="https://www.collectiveray.com/out/tf_brixton">
Very trendy, very hipster - you'll love this theme with a very elegant and clean design. It is a very good choice for any personal blog, no slideshows or animations, just straight to the point with information presentation cleanly and minimally. Social media is covered with widgets as necessary!
Besides the awesomeness of this WordPress blog theme, you also get the PSD files, so that you can do any changes you want. A recent update of the theme has included font-awesome icons.
The logo of the theme is also available for free for you to use in any way you would like. Let's see some of the features Brixton offers:
- UNLIMITED COLOR VARIATIONS
- Superfast loading
- Google Web Fonts
- Full width and boxed version
- SEO optimized
- Instagram Feed
- Made for readability
- Creative Design
- Video, Gallery, Audio, Quote, Standard and Link Posts Templates
- Clean and Crisp Design
- CSS3 Features and Animations
- Detailed written help file
- Use your custom logo and favicon icon.
- 7 Post Templates (Standard, video, link, gallery, audio)
Have a look at the target="_blank" a href="https://www.collectiveray.com/out/tf_brixton">LIVE DEMO here.
target="_blank" a href="https://www.collectiveray.com/out/tf_hemlock">Hemlock - A responsive WordPress blog theme
target="_blank" a href="https://www.collectiveray.com/out/tf_hemlock">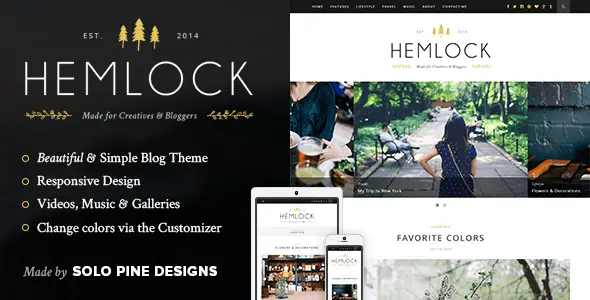
This is one we really really love! It is an awesome template - we do believe it is quite girly and feminine and a perfect choice for a WordPress travel or food/restaurant or lifestyle blog.
The structure and layout is perfect for highlighting the "blog of the day" - gives a lot of prominence to whatever the author is blogging about that day. This theme is all about form, though the function is obviously very well done too!
This theme will make sure your blog stands above the rest - screaming modern sophistication.
target="_blank" a href="https://www.collectiveray.com/out/tf_blogoma">Blogoma - Sweetest Simple Blog Theme
This is another theme we absolutely love! There's something about simplicity that makes it the ultimate sophistication! Whilst Hemlock above has a girly feel - Blogoma has very techy feel and is a perfect choice for something such as Tech, Gadget, Sports, Watches, Cars or another technology blog, or other manly or geeky stuff.
target="_blank" a href="https://www.collectiveray.com/out/tf_blogoma">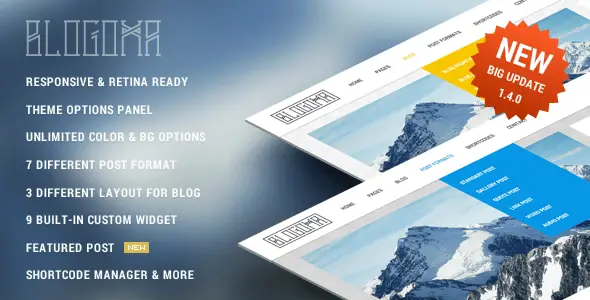
Of course, the theme is very adaptable to many uses, so don't limit yourself to what we're saying and have a look at the target="_blank" a href="https://www.collectiveray.com/out/tf_blogoma">LIVE PREVIEW right now.
target="_blank">John Doe's Blog - Clean & Personal WordPress Blog Theme
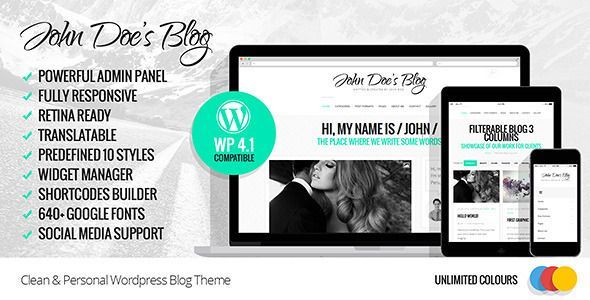
John Doe's Blog - just like its name is a simple, clean and modern theme for a blog that is ideal for sharing your personal stories. It is of course responsive. It's got many features that won't bloat your Wordpress installation.
The theme features 10 predefined CSS styles, 8 custom widgets, 60+ shortcodes, and 8 post formats including Standard, Aside, Gallery, Link, Image, Quote, Audio and Video.
The powerful and friendly admin panel is focused towards user-friendliness, rather than other bulky themes, where the newbie blogger might get a little bit lost. The theme is also social media ready, so you'll be able to integrate Facebook, Twitter, Instagram, Flickr, Pinterest profiles with your website from the get-go.
It also had Fontello integrated, so you've got literally over a thousand icons to choose from to use with this theme. There are also 6 blog layouts, and 15 custom page templates which you can "style" your blog pages with the essential stuff like galleries, contact us pages, filterable blogs, and full-width pages.
But enough descriptions - maybe it's better to just see for yourself in the target="_blank">LIVE DEMO?
target="_blank" a href="https://www.collectiveray.com/out/tf_retro">Retro Portfolio - One Page Vintage WordPress Theme
The great thing about the internet is that whatever your style, you're going to find something that fits you.
target="_blank" a href="https://www.collectiveray.com/out/tf_retro">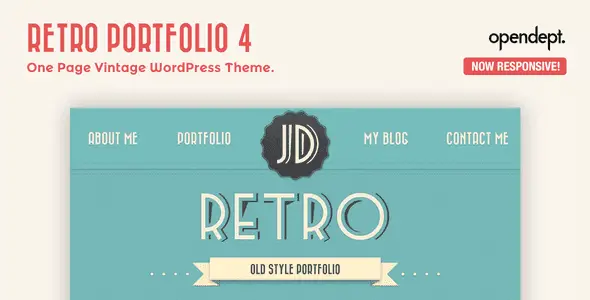
So we've just mentioned technology and sophistication in our previous two spotlights. Our next WordPress personal theme goes VINTAGE. If you love a retro style, Retro Portfolio is a one-page vintage WP theme. It has just been released as a responsive theme...something which happened only quite recently!
Let's see some of the features of this theme:
- Fully Responsive
- Retina integration for logo and banner
- Can easily add, remove and rearrange sections in the homepage
- can easily change the colour of any single section, page or blog post thanks to the introduction of a new color picker
- Google Fonts integration
- New icons
- New responsive slider
- Portfolio gallery
- Anti-spam filter on the contact form
- More CSS, less images
- Completely Translatable
- Updates Notifier
- Detailed Documentation
Check out the target="_blank" a href="https://www.collectiveray.com/out/tf_retro">live demo of Retro here
target="_blank" a href="https://www.collectiveray.com/out/tf_elantra">Elantra 2015 - Elegant Personal Blogging Theme
Another really neat and stylish personal blogging Wordpress theme is Elantra 2015. If you don't know how to create website, this template is simple but elegant design makes a very good choice for a personal blog, and it's powered by Bootstrap 3 - so responsiveness is built-in to the template. It is an absolutely good choice for those wanting to create a travel, hobby, cooking or fashion blog. All images are displayed via Magnific Popop Window, so they literally jump out of the (browser) window when you click them :)
It's easy to add SoundCloud songs, Vimeo/YouTube video, audio and video by WordPress Hosting Url, Quotes & Links posts, or Mosaic/Slider Gallery post.
And with the inclusion of 600+ Google Web fonts - you're sure to create the special style just for you!
a href="https://www.collectiveray.com/out/tf_elantra" target="_blank">
Why don't you check the beautiful target="_blank" a href="https://www.collectiveray.com/out/tf_elantra">LIVE PREVIEW here?
Make sure your WordPress theme is responsive
A note on WordPress theme selection. You can choose any proven them you like, with any combination of colours, design, interaction, and features but it must have one thing.
It must be responsive.
A responsive web theme means it can automatically scale itself to different size screens. What may look amazing on your laptop or desktop may not work so well on mobile. A good quality responsive theme should be fully responsive so it scales to any screen size.
It should also add or remove features depending on that screen size. There may be a little configuration on your part for that but responsiveness has to be built into a theme. It cannot be added afterwards.
We've taken the time to choose quite a few WordPress themes which we love. We think they offer great options for theming your WordPress blog. Check out some of our options in our WordPress themes section or check out the below.
- WordPress themes for setting up an online shop
- WordPress themes for setting up a personal blog
- 25+ Real Estate Website Templates + 20 Proven tips to sell your property online
Optional: Set up a local installation to customize your WordPress theme
This is an optional step but one you may like to revisit once you’re up and running.
All the WordPress themes we recommend on our how to start a blog tutorial come with attractive, readymade designs. All you need to do is install and activate, add your logo or name and you’re ready to go.
However, if you want or need, to customize the theme before launching, you can either do that on the live setup or set up a local WordPress installation and do it on your computer.
Customizing the theme before the website goes live isn’t an issue as nobody is going to be affected by it.
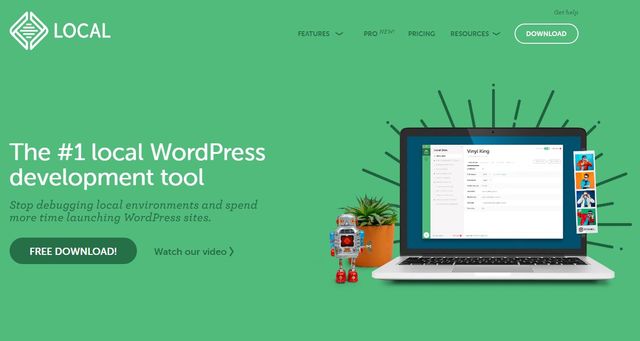
Modifying a WordPress theme once your site is live may impact the customer experience. That’s a good a reason as any to set up a local installation. We use Local by Flywheel. It is easier to use than Xampp and sets up a WordPress installation within a virtual machine on your computer. It looks, acts and feels exactly like WordPress except it isn’t a live website.
Local by Flywheel is free and works on Windows, Mac, and Linux. It creates a virtual machine complete with WordPress. Once loaded, you can use the domain and /wp-admin login to access your WordPress dashboard just like you would on your live blog.
You can then install your WordPress theme, all plugins and even import or create a database. Or you could leave everything as default, load the WordPress theme and begin customizing.
Once you have customized the theme to your needs you can copy the files across to your live website. It’s a very straightforward way of managing and updating a website!
Back to starting your own blog.
11. Create a few basic pages
Your WordPress website is for letting people know about you, your company, your product, your club, hobby or something else you want your visitors to get to know about. So for your visitors to get to know you quickly and easily you might want to create a few standard pages.
At the very least you should create:
- A homepage
- An About Us page
- A Contact Us page
- A privacy page
Set the homepage or front page of your WordPress website
This is where everybody lands as soon as they hit your website when they enter www.yourdomain.com. By default, WordPress shows a list of your latest posts. If this is the way you want your landing page to be, you don't need to make any changes.
On the other hand, if you want to create a static page such as a company page or landing page, you can go to Pages > Add New and create the content which you want to be displayed as your front page.
The new Gutenberg blocks dashboard in WordPress makes it very easy to create pages.
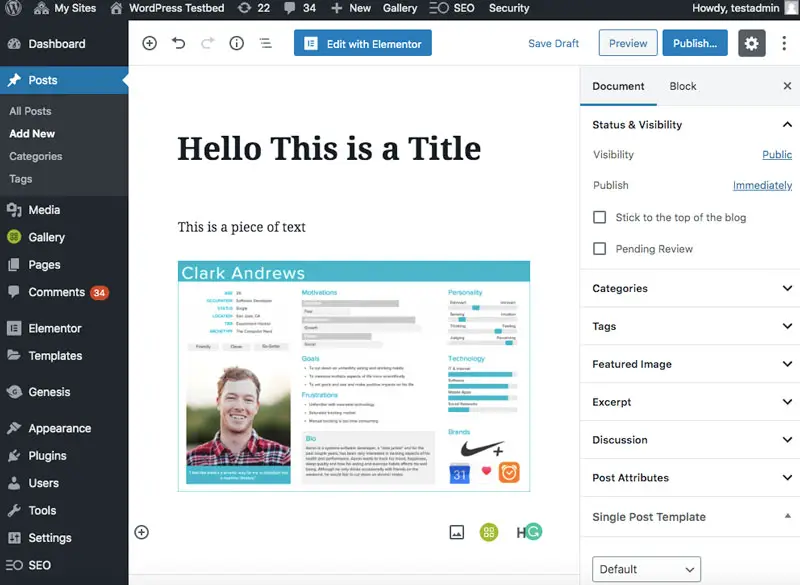
Once you are done with the content of this page, set the page as the front page of your website by going to Settings > Reading and choose the page you have just created to be displayed as the front page

About Us page
The about page will be a bit of detail of who you are. The about page is one of the pages that most people visit who don't know about your website go to understand who they are dealing with.
This is your bio, CV and cover letter in all one. Make sure you create a succinct description of who you are and what you and your website are all about. It’s your opportunity to tell your story and get people to buy into your passion. An About Us page should never be underestimated!
The Contact Us page
Once people have arrived on your site, you want to make sure they can get in touch with you as easily as possible. You can either put in an email address, telephone number and other basic contact details.
You could also choose to install a Contact Form WordPress plugin (such as this one), to be able to display a contact form.
A Contact Us page should also include a Google Maps Widget. This is especially true if you are a service-based business or have a physical location. Not only do you need to show and tell people where you are, but you will also want to rank for local SEO.
Having a Google Map widget feeds into Google My Business combines to make you easy to find and to rank in local search.
If you're not too familiar with how to set this up, may we suggest this plugin which will help you get done with this in minutes? You can use either the free version of the plugin which we linked above, or opt for the PRO version, which is actively being used by more than 100,000 users.
Privacy pages
Privacy pages are now required in some regions and are regarded as essential by many users. It is useful in regions subject to GDPR and makes a good first impression for human visitors and other businesses. Even if all it says is that you don’t use tracking cookies or record visitor data, it is now regarded as a necessary page by many.
Other pages
If your site has a specific scope of displaying information about a product, service, or anything else which you might want to get across to people, you can create pages for the stuff which you want to show to people.
Post categories
If you plan to use WordPress as a blog, or somewhere where you want to display posts often, it would be a very good idea to configure categories for your posts. The one thing which you need to keep in mind when creating the post categories is User Experience.
You want to optimize the user experience so create categories that make it as easy as possible for your visitors to get to the posts they are looking for in the shortest time possible.
You can create categories manually or have WordPress create them as you post. If you already know what kind of categories you’ll be using, add them manually as it will save time down the road.
Select Posts from the left menu in your WordPress dashboard and select Categories from the slideout menu.
- Type a name and slug in the left of the centre pane.
- Select Add New Category when done.
- Rinse and repeat for every category you want to create.
Start posting!
Once you've set up the basics, you should now start adding some content. This is going to be an ongoing process throughout the life of your blog.
As a rule of thumb, you should be creating posts that are unique and useful for your visitors. If they are useful for your visitors, they will be more likely to stick around or come back for more.
12. Make your blog search engine friendly

One of the most important aspects of how to start a blog is optimizing the content for search engines. By optimizing content for search engines, you make sure that when people are searching for certain phrases, your website is displayed in the search results as often as possible.
Although SEO (Search Engine Optimization) is not a one-off task, there is one thing you need to do to optimize your WordPress website for search engines. Besides choosing a theme (see below) which is search engine friendly, you'll want to make sure that you install the SEOPress plugin.
SEOPress
The SEOPress plugin enhances the SEO features of your website by providing a number of essential features such as:
- An XML sitemap of your website. Google, Bing, Yahoo, and many other search engines use Sitemaps as a guide of when and what posts to look at when they visit your search engine. An XML sitemap is a detailed map of the content of your website that is readable by the search engine. The SEOPress plugin ensures a good sitemap is created for your website, verifies your website ownership on a number of Webmaster tool pages, and submits the sitemap of your WordPress website to the Google, Bing, etc, WebMaster tools portals on your behalf.
- Control of title and meta-data tags. Two of the most significant on-page SEO indicators are the title tag and meta-data description. SEOPress allows you to configure these tags as necessary for the best possible SEO scores.
- Keyword focus. If you are targeting specific keywords or keyword phrases, SEOPress makes sure you do all the necessary tweaks to ensure your page will rank as well as it can with on page changes. Things such as having the keywords appear in headings and sub-headings, keywords appearing in the content at specific densities, appearing in the ALT tags of images and other on-page SEO techniques.
We strongly suggest you get to grips with SEO once you are up and running as it’s an essential part of blogging. It is also detailed, sometimes complicated and changes all the time. Despite that, it is also very interesting!
If SEOPress isn’t for you, WordPress SEO by Yoast is a viable alternative.
If you'd like to learn more about SEO, we've written an excellent article here: WordPress onpage SEO Checklist: a 21 step-by-step guide to boost traffic
Here are a few basic SEO changes to make to your new blog:
- Navigate to Settings and Reading and endure Search Engine Visibility is checked.
- Make sure you set SEO friendly URLs as suggested with Settings and Permalinks.
- Check your URL in Settings and General. Make sure the www. setting and HTTPS settings are correct. They must match the domain. All blogs launched now should be HTTPS.
- Add your site to Google Search Console to make sure it is found.
- Make sure to list a sitemap when you use an SEO plugin.
- Make sure to use snippets if you use an SEO Plugin.
Website SEO is a huge subject and slightly out of scope for this guide. Nevertheless, covering these basics will at least set you on the path of organic SEO.
13. Make your website fast and sociable
Make your website fast
Slow WordPress websites do not perform well. With page loading now an SEO ranking signal for Google, slow sites do not rank well. Plus, our patience for waiting for slow websites to load is almost non-existent.
If your front page takes too long to load, your visitors will go somewhere faster.
If you want your website to be as fast as possible, you'll need to make sure you have a good WordPress host but you'll also need to help it along. There are some good plugins out there, however definitely the best one out there to make your WordPress website fast, you'll need to install a WordPress caching plugin or a plugin such as WP Rocket.
When installing this plugin, your site immediately gets a boost, besides rating much better in websites such as Google PageSpeed Insights or GTMetrix (websites that measure website speed). This means that your site is going to faster and much more pleasant experience to your visitors.
This is not a free plugin, but, as you might know, Google gives a lot of attention to websites which are fast.
In addition, the negative user experience of a slow website is something you need to avoid at all costs, (if you want your website to be successful in the long-term), so do make sure you make sure your website is as fast as it can get with WP Rocket!
There are free plugins that do a similar job. Plugins such as Autoptimize or Pagespeed Ninja. There are a number of plugins that aim to speed up your WordPress website but these three we have personal experience of using and they all do a decent job, but none can match the benefits of using WP Rocket.
Before you begin loading plugins and changing settings, visit PageSpeed Insights by Google to see how you are performing now. You want your score to be as close to 100 as possible for both mobile and desktop. Few websites will get to that 100 score without significant effort but it is possible to drastically improve the score with the plugins mentioned above.
Prepare for social sharing
Besides traffic from search engines, another great source of traffic is Social Networks such as Facebook, Twitter, LinkedIn, and Pinterest. So you need to make sure that your website is enabled for social sharing.
As a bare minimum, you need to make sure all your pages have a share button enabled for Facebook, Twitter and a number of others (where you target demographic visits most often).
You also need to ensure that the pages are "share-friendly", meaning that code is inserted into each page to make sure that the site displays images and descriptions as necessary for each social network. Fortunately, we've got you covered, you won't have to worry too much about inserting these codes into your site. The SEOPress plugin also covers your site for social sharing.
A useful plugin you may like to use is called Blog2Social. It automates many social media posting tasks. For example, you can set the plugin up to automatically post any new blog post to your Facebook page, Twitter feed, Instagram account, LinkedIn profile and more. Once you identify where your target market hangs out, this could be a real time saver!
14. Do your thing
By now you should have a fully operational blog.
You should have a domain name that means something, a web host that delivers excellent page speed, a great theme that loads quickly and works on mobile and a few plugins to make things run more smoothly.
That is the basics of starting your own blog. You may think this is the end of the road. You would be wrong. This is just the beginning. We have helped you lay the foundations by setting everything up.
Now it’s your turn.
It’s now up to you to turn on your creativity and use your blogging schedule to deliver regular, high quality, interesting blog posts to keep visitors coming back for more.
15. Promoting your blog

No guide to starting your own blog would be complete without a little information on promotion. After all, there’s no point in writing on a regular schedule, working hard to deliver entertaining posts if nobody knows they are there!
Blog marketing is a huge subject and one that is a little out of scope for this guide.
However, we think it our responsibility to ensure you have a few pointers on promoting your blog once you begin posting.
Make sure to promote on social media
We mentioned using social media plugins to automate social media posting but don’t forget social networking is a conversation.
Don’t just publish and then forget about it. Reply (positively) to commenters, follow others in your niche or who might be interested in your blog and gently and very occasionally, pitch it to them with a link or a mention.
Post to Facebook groups if somebody has asked a question that you have replied to or answered in detail in one of your blogs (as long as you have the permission of the owner of the blog).
Submit your blog to bookmarking websites
Bookmarking websites can be a useful source of web traffic.
Depending on your niche and the website’s intent, you may find all or just a few bookmark websites work. It’s a judgement call that only you can make.
Comment on other blogs
You have to give to receive, or so they tell us.
Therefore, commenting on other people’s blogs in niches related to yours can generate some traffic. Not all websites allow comment links to be followed. If not, mention your own blog by name and make positive, valuable comments to generate traffic back to your own work.
Guest posting
Once you’re confident as a blogger, you could offer your services as a guest blogger.
This usually entails writing a free post for another website in return for attribution and a link back to your blog. This is very popular in a lot of niches so it is well worth exploring. Everyone likes getting something for nothing and if all you ask for is a link back, who is going to say no?
PPC – Pay Per Click
If you’re in a hurry to get your blog off the ground, you could give it a paid boost with PPC ads.
These are the ads you see with the ‘Ad’ moniker in Google, ads in Facebook, ads on web pages and in forums. You have to pay, hence the name but they are a very viable way to get traffic. But they do cost money. Sometimes a lot of money!
We would only suggest PPC for those in a hurry as this is another complicated subject. It is too easy to spend a lot of money for very little return.
16. Backing up your WordPress blog
One aspect of running a blog many other how to start a blog guides forget to cover is backups.
If you pour your heart and soul into your blog, you want to protect it. Part of that is the barrier method, using a security plugin with firewall, designing a super-strong login and practical steps. These are all aspects that we have described as part of securing your blog step.
The other is setting up a backup.
You can use Jetpack to perform regular backups or you could use a dedicated backup plugin. There are lots of options. Some are free while others cost money.
We have used both Jetpack and UpdraftPlus and can recommend both. Make sure whatever backup solution you use includes the option to back up the core database and your wp_content folder. This is where your images and files are stored so you’re going to want a backup of that for sure.
Depending on how you want to run your blog, you could leave it there or configure backups in a lot more detail. As long as the core database and wp_content folder is covered, everything else is a bonus.
Make sure that backup is not just saved locally on your web host. First, backups take up valuable disc space which is limited on shared hosting plans. Second, if your webhost suffers a hack or a hacker gets into your share, you could lose everything, including the backup.
Our recommendation is to have a copy saved on your web host for fast backups and another emailed or saved to the cloud. A weekly backup saved on your host and a fortnightly or monthly backed saved elsewhere should be more than enough.
There is no rule for backups aside from making sure you have one. Otherwise, the more you post and the more you value those posts, the more you should back up.
17. Shortcut - Create a website in 2 minutes
Now that we've actually shown you how to do it all the long way, there's also the short version. How to create a website in literally 2 minutes.
If you want to start a blog, by now you now know that the easiest way to do this is by using WordPress. Although you may think it is difficult to create a blog on WordPress using the steps above, we can show you a very easy way to do it.
All it takes is 2 minutes if you use our recommended method. This is because rather than having to do it all yourself, you can just create a blog with an automatic installation on a hosting server.
Recommended Reading: What is the Purpose of a Blog and Do I Need One?
Once again, we're going to recommend using WordPress. You know WordPress is used for all types of websites, but one of its main reasons has always been to create a blog.
Here’s how to do it in 2 minutes flat!
Create an InMotion Account
We recommend InMotion because we have used them ourselves. We find them fast, responsive and good value for money. More importantly, they offer a fully automated setup service. That’s how we can show you how to create blog in 2 minutes with InMotion.
Create a blog in 2 minutes
Once you've logged in to your InMotion account you'll need to visit your CPanel by clicking the button as shown in the image below.
Once you are in CPanel you'll immediately be able to see how to create blog via the WordPress MAnager auto-installer. This will do all the technical work for you, so you don't have to worry about creating databases, passwords, downloading source code and configuring anything.

You don't need to know how to create blog yourself. All of the work will be done for you via the auto-installer.
Once you click on WordPress Manger you should find yourself on the following screen. As you can see, simply click on the New Site button to create your blog on the domain of your choice.

Once you click on the Install button you'll get a few options. You can leave all the options as they are - no need to do any changes.
Once the installation is ready, you will be presented with the WordPress admin credentials that you can use to perform the rest of the setup process as per our how to start a blog article.
18. Maintaining your blog
Finally, it’s only right that we spend a minute discussing blog maintenance. Setting everything up and getting it running is only half the battle. Keeping it running and up to date is just as important. Fortunately, WordPress makes that fairly straightforward.
Enable automatic updates
Newer versions of WordPress come with automatic updates enabled by default. Check your version in Dashboard and Updates. You should see a message that says ‘You have the latest version of WordPress. Future security updates will be applied automatically.’
Check your blog weekly or monthly for non-security updates as needed. The more often you blog, the more frequently you should check. Once per week is often enough for most people.
If a plugin asks to set updates to automatic, allow it. WordPress will alert you if a plugin requires an update but it is far easier to have them update themselves. Again, a weekly check for updates is plenty enough. You can quickly see if a plugin requires an update as you will see a red bubble with a number in it by the Dashboard menu in the WordPress dashboard.
Delete anything you don’t need
Once your blog is fully operational and you are happy with how it looks and feels, remove any themes you didn’t use and any plugins you decided not to use. This saves disk space and reduces database tables. Both useful for efficiency.
Use a WordPress security plugin
Security is part of maintenance and keeping unauthorized users out should keep your blog operating efficiently. Regularly check your security plugin to see how many hack attempts have been tried and how many users have been blocked from trying to use the admin login. You will be amazed.
Make a backup of your WordPress website
We covered making a backup of your blog earlier but it is worth restating the point here. If you are pouring your heart and soul into your blog, the last thing you want is to lose it to a hack or server failure at your web host. A backup is an essential part of blog maintenance and not something any blogger can afford to ignore.
19. How to Start a blog FAQs
How do you start a blog for free?
You can start a blog for free on WordPress.org. This is different from WordPress.com that offers free blog hosting for beginners. You don’t get to choose your own domain name and options are limited but if you want to test the water before spending money, this is how to do it.
How do bloggers get paid?
How do bloggers get paid? In the beginning, you don’t. Typically you would implement ads on your blog to provide a little income. You can move on to sponsorship, product placement, sponsored posts and other initiatives but you will need a significant readership before you can do that.
How do I start writing a blog?
This guide shows you exactly how to start writing a blog. It all begins with an idea. You can turn that idea into a plan and then into reality following the steps outlined in this guide to starting a blog.
Are blogs still popular?
Blogging is still immensely popular but the landscape has changed. Blogs that don’t offer much in terms of uniqueness, interest and entertainment don’t seem to be around for long. Blogs that deliver unique, interesting content still thrive. Company blogs are still incredibly important for marketing.
How much does it cost to start a blog?
It doesn’t have to cost much to start a blog. You can begin for free using WordPress.org or start your own fairly cheaply. A domain name can cost £10/€11/$13 and hosting can cost anywhere from £25/€28/$30 per year. If you purchase a WordPress template, expect to pay around $50-$60 as a one-off fee for that.
Most plugins are free but some include an annual charge. These vary depending on the quality and complexity of the plugin.
Conclusion
As you can see, while it may take a couple of minutes to start your own blog, it takes a little longer and involves a little more planning if you want to do it properly. The physical setup is a breeze and many web hosts include tools that can automate much of the work for you, as our guide has illustrated.
However, we think it’s also important for you to know that even though we use premade themes, have installation automated and use tools to manage website elements, you still have full control over the look, feel and operation of your blog.
Everything that is changed by themes or plugins can be customized. Every setting a plugin changes can be changed back or controlled. Once you know how that is!
Starting a blog is the easy part. Keeping it running with interesting posts, promoting it using social media, keeping your blog secure and maintaining it takes a bit more work. However, this guide should give you everything you need to build, manage and maintain your new blog.
So what do you think of our choices and full tutorial on how to start a blog using WordPress? Have you got any recommendations we could include in a future update? Do you find this article about how to create a blog useful or is there something more which we can add to this content? Tell us below in the comment section.

