Not content with bringing us one of the easiest drag and drop page builders around, the team behindqwa Beaver Builder has now created Assistant Pro.
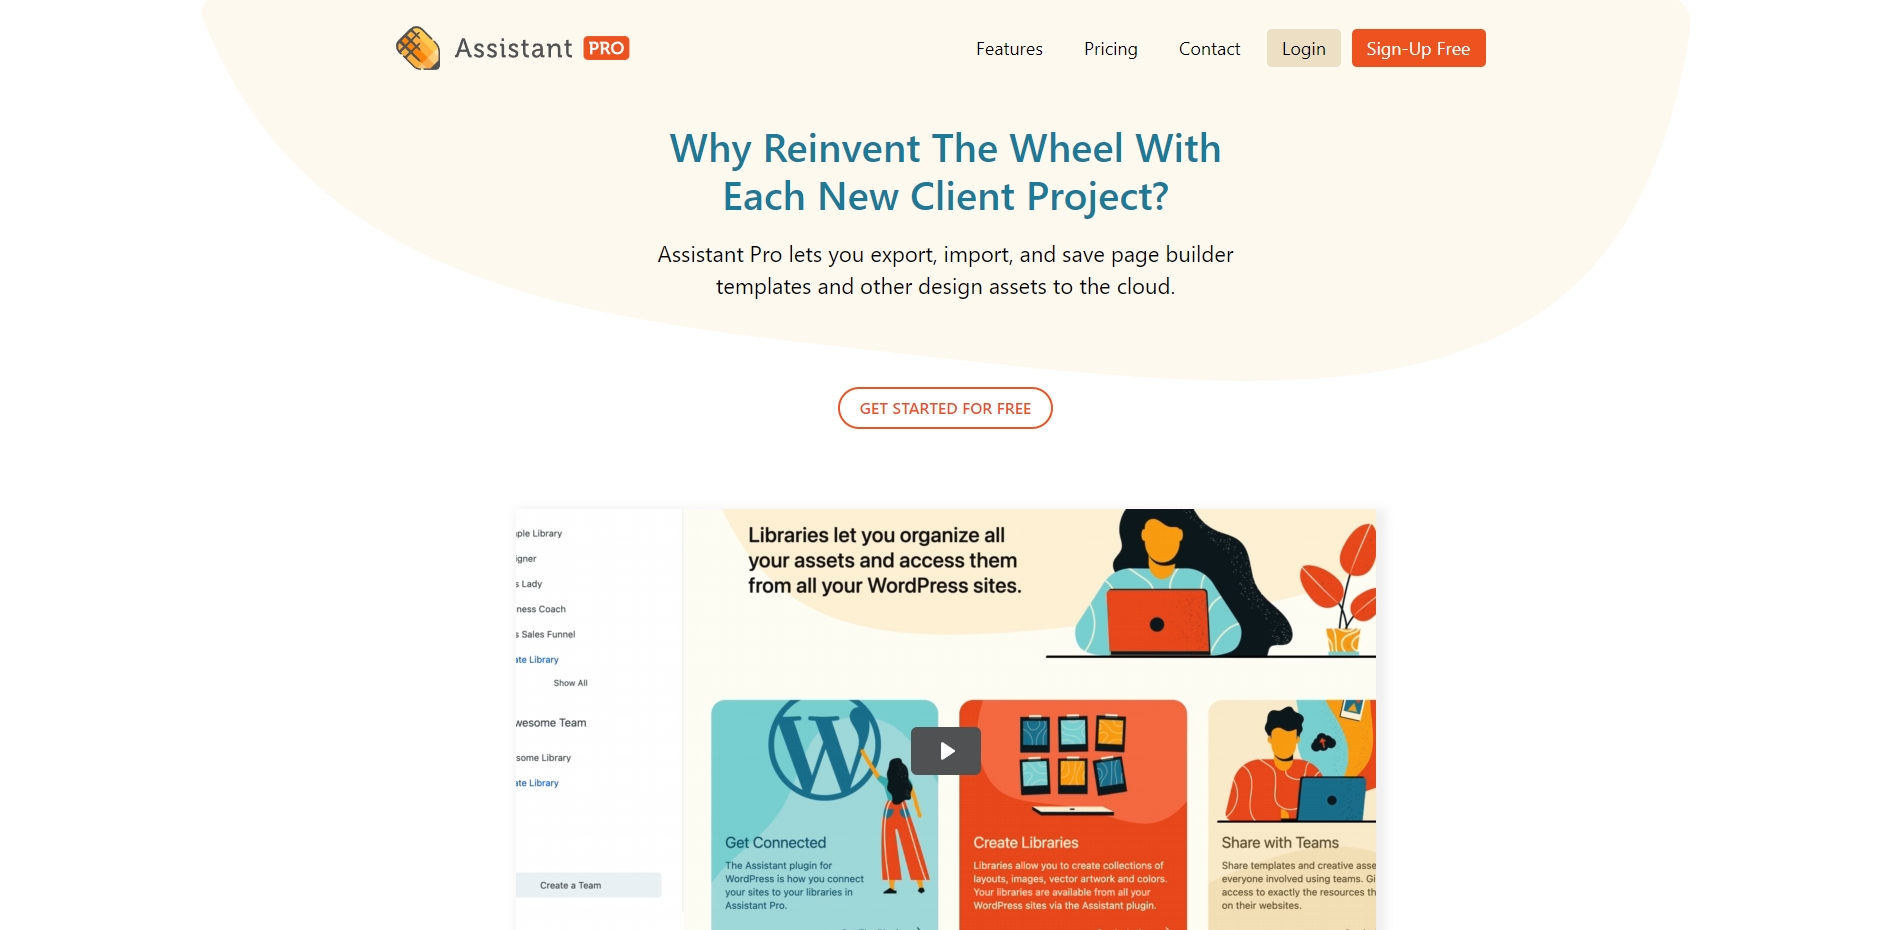
Assistant Pro is a kind of cloud storage app for web developers. It enables you to upload, share and use web assets such as images, templates and the myriad of other elements that go into a website.
But is it any good? Is it worth using over a shared Google Drive? Does it have any tricks up its sleeve?
Let’s find out!
{autotoc}
Summary
|
Ease of use |
⭐⭐⭐⭐⭐ |
|
Features |
⭐⭐⭐⭐ |
|
Pros |
|
|
Cons |
|
|
Assistant Pro pricing |
Free/$15/$20 per month |
|
Verdict |
⭐⭐⭐⭐ |
What is Assistant Pro?
Assistant Pro is the premium version of the new Beaver Builder Assistant tool. It installs as a plugin and enables file sharing within a website using cloud storage.
It’s a novel idea that could save a lot of time and file sharing on the typical web project.
It looks and feels similar to the Beaver Builder overlay in WordPress. You have a light menu with an easygoing feel, simple tools and lots of options.
There are two versions, the free Assistant tool and Assistant Pro.
Both add a slider menu to the front end of your website that you can use to access shared assets.
You can use this menu to access shared images, videos, audio clips, templates and other elements you would typically use in web design.
Free users’ assets will all be publicly available, with no privacy option. The Pro version enables you to keep assets private and restrict access as you need.
One definite mark in Assistant Pro’s favor is the fact it’s compatible with Beaver Builder, as you would expect, but also other page builders too.
If you like the look of the features but have created using Gutenberg, Elementor page builder or Brizy, you can still use Assistant Pro.
That’s a smart move.
If you’re a web developer or designer and collaborate with others, Assistant Pro could definitely improve your day.
Check out the following video about the top features and benefits of the product:
https://www.youtube.com/watch?v=vXv4S-2ANWo
How easy is it to use Assistant Pro?
Assistant Pro is very easy to use once you learn how to access it. As long as, like I did, you don’t go hunting for a menu within the dashboard, you’ll be fine.
As long as you’re logged into WordPress, select Visit Site from the dashboard and you’ll see the Assistant appear on the right.
If it doesn’t appear automatically, there will be a small colored icon in the top right, click that to access Assistant Pro.
From there, you can select assets such as images, video, audio, templates and key website data from within that slider menu.
When you want to interact with the Assistant, select the asset you want, perform minor edits within the menu, check dimensions and any other details.
You can also use the controls to access WordPress actions such as to edit a post, create a new post and more.
Overall, Assistant Pro is relatively easy to use with few roadblocks to productivity.
Assistant Pro features
Assistant Pro brings a range of useful features to the table that make it worth checking out.
Upload templates and page elements and share them
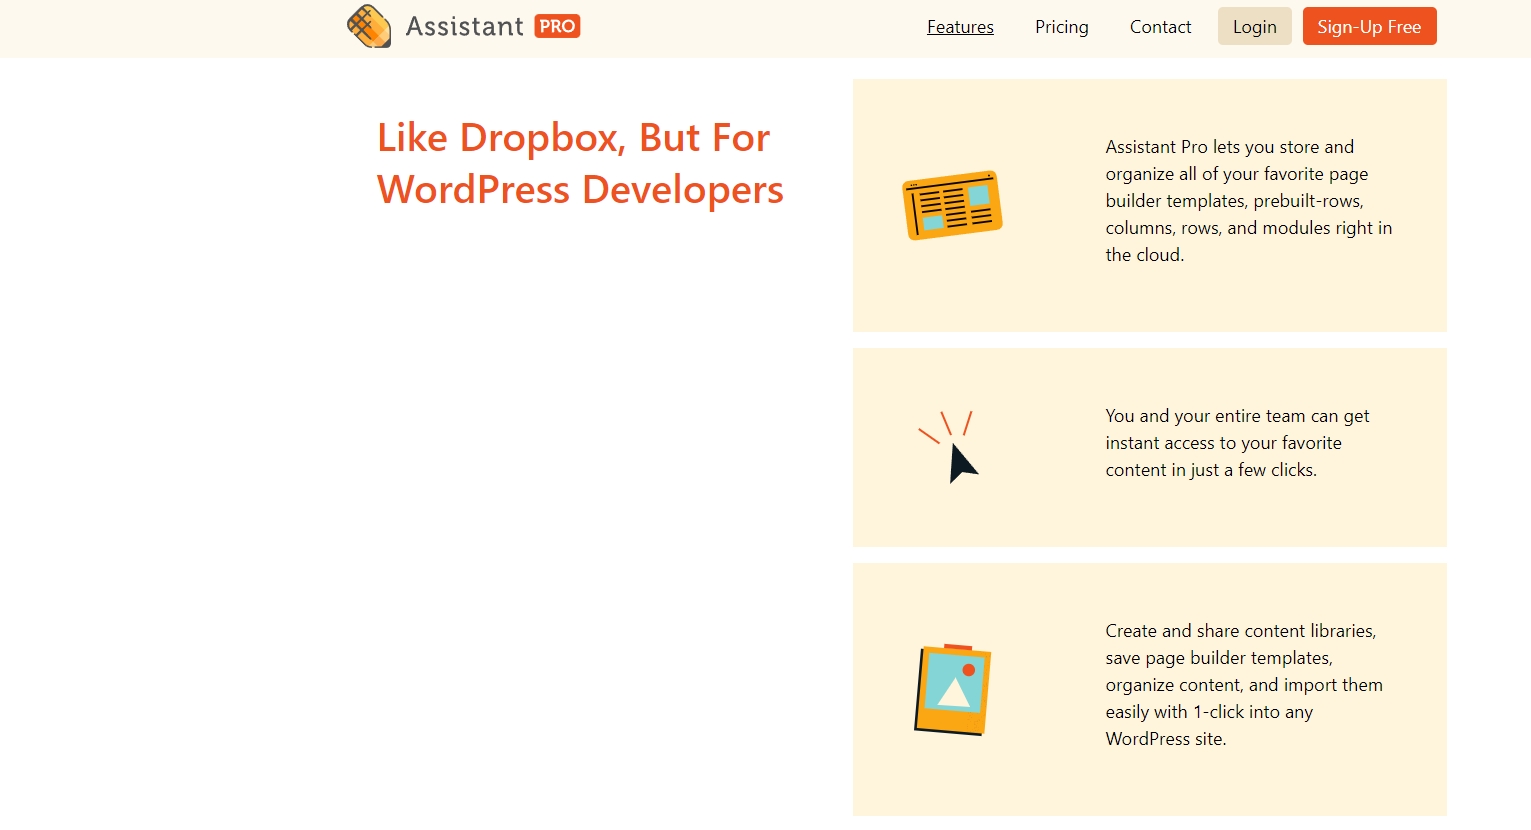
The key feature of Assistant Pro is the ability to create and share assets for websites with a simple interface.
You can create an image, banner or widget on your laptop or desktop and upload it to Assistant Pro. From there, you or one of your team can access that asset and use it on the page.
It’s a simple premise but could potentially save a lot of time!
It’s faster than using Dropbox or Google Drive and has a range of simple tools and commands within the menu to speed up your workflow.
Supports team organizations for larger agencies
The intent behind Assistant Pro is to speed up web design. To bring all your assets and resources into one place for everyone on the team to use.
For larger agencies, you can create teams for projects. The shared storage will be segmented to just that team and only those within the team can access them.
This can help keep things organized and ensure assets aren’t mistakenly shared within the wrong project.
You can also add clients to the team if you like so they can share brand assets and anything else you might need.
Easy to use Assistant sidebar
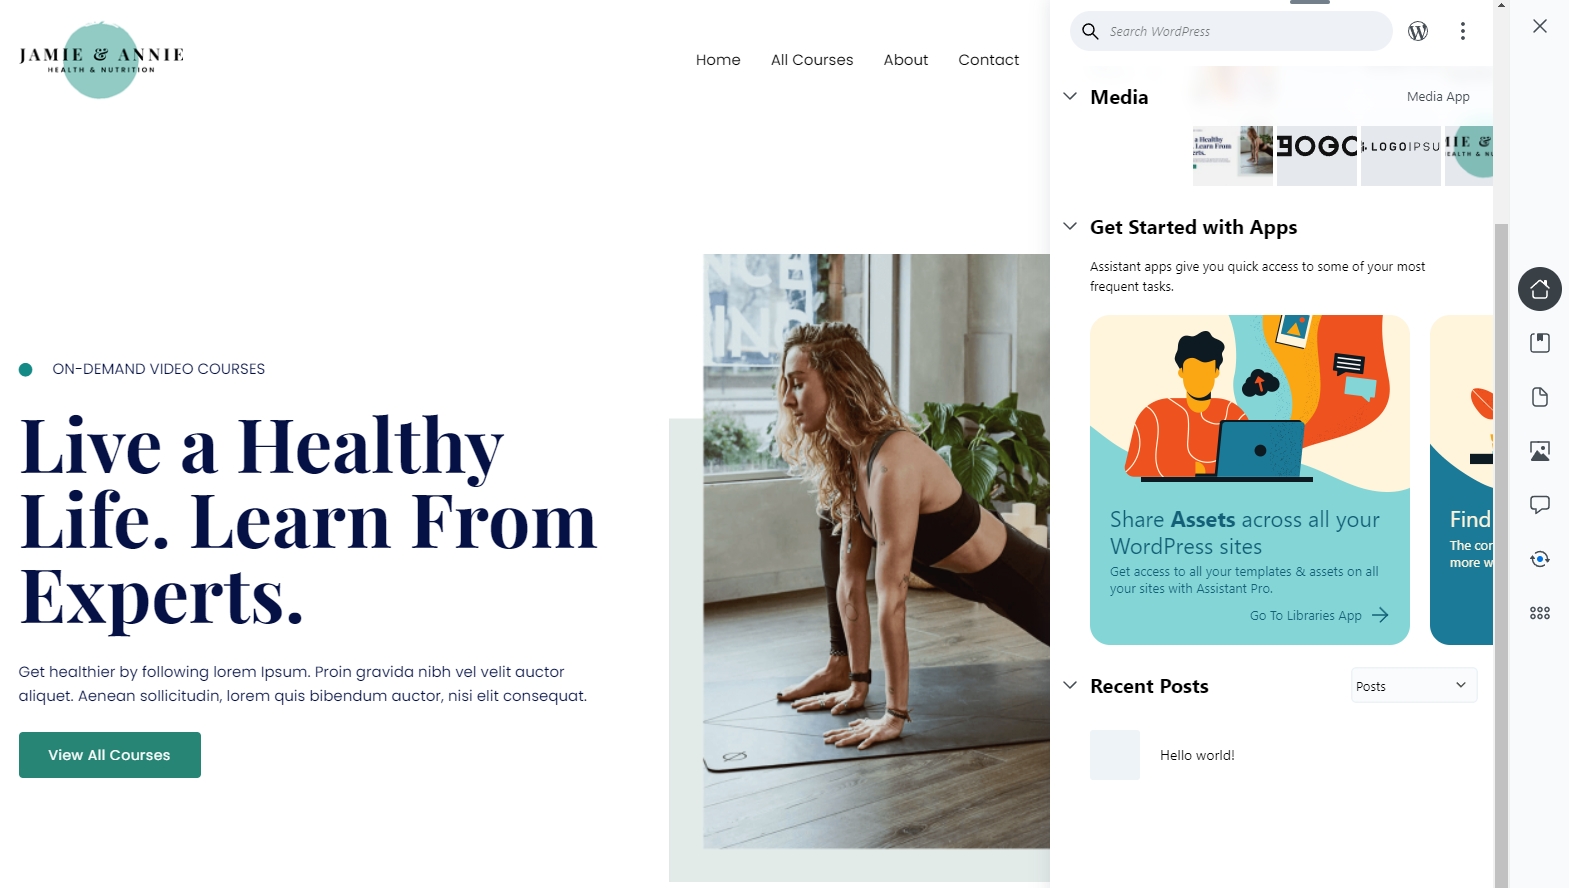
Once you figure out where to access Assistant Pro, using the sidebar is easy. You will probably find yourself trying to drag and drop assets from the sidebar onto the page like I did, but once you get over the fact this isn’t possible, you’ll begin seeing what else is.
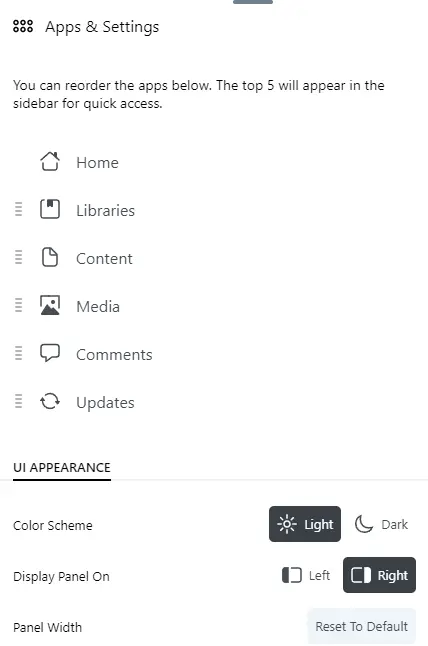
The sidebar has tabs on the far right that take you between functions. Home at the top, Libraries underneath, then Content, Media, Comments, Updates and finally Apps and Settings.
It’s an intuitive layout that reflects how well Beaver Builder itself is put together.
Spend longer than five minutes with Assistant Pro and you’ll be able to figure it all out.
Supports a wide range of web assets
As Assistant Pro is cloud storage and then some, you would expect it to support the vast majority of file types you would use in development.
And you won’t be disappointed.
Assistant Pro supports wireframes, images, layout templates, page and posts, WordPress theme files, color codes and just about every type of asset you’re likely to use on a project.

Public libraries
Assistant Pro users will be able to access the Beaver Builder community with its library of assets to use within web projects.
You can share your own assets with the community for them to use and browse and use any assets you find.
You will also be able to browse community assets and use them in your own projects.
Great support and documentation
If you have ever used Beaver Builder, you’ll know the company is great at documentation.
There’s lots of it on their website, it’s clear, written in plain language and is designed to be accessible to everyone.
It’s the same for Assistant Pro.
There’s a lot of documentation explaining everything. There are also helpful videos, useful social media content and that community content we mentioned above.
Working with Assistant Pro
Assistant Pro is very easy to install and use, which is one of its strengths. As we’ll say a few more times throughout this review, if you have used Beaver Builder, Assistant Pro shares the same easygoing philosophy.
Everything is logically laid out. Navigation is simple and clear and the language is very inclusive.
With all that in mind, let’s walk you through using it.
Installation
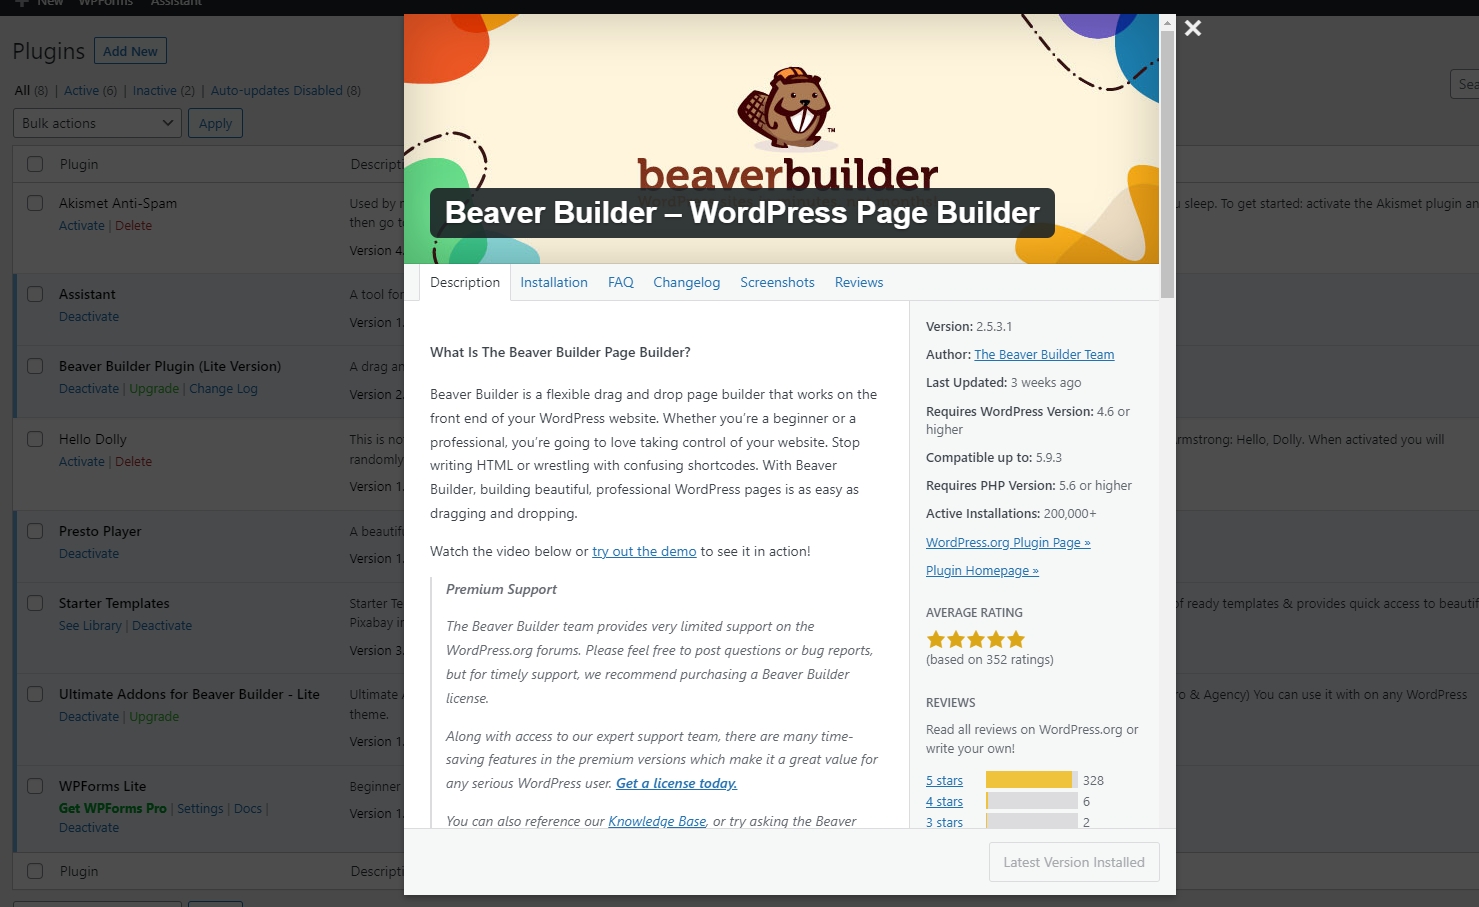
We began by using the free version and upgrading from there. You can do that or head straight for the Pro version.
- Log into your WordPress instance
- Select Plugins and Add New
- Search for ‘assistant’ in the top right search bar
- Select Assistant – Every Day Productivity Apps - By The Beaver Builder Team
- Select Install and then Activate once the option becomes available
That’s it for the Assistant plugin.
If you select your website name at the top of the WordPress dashboard and then Visit Site, you’ll be taken to the front end.
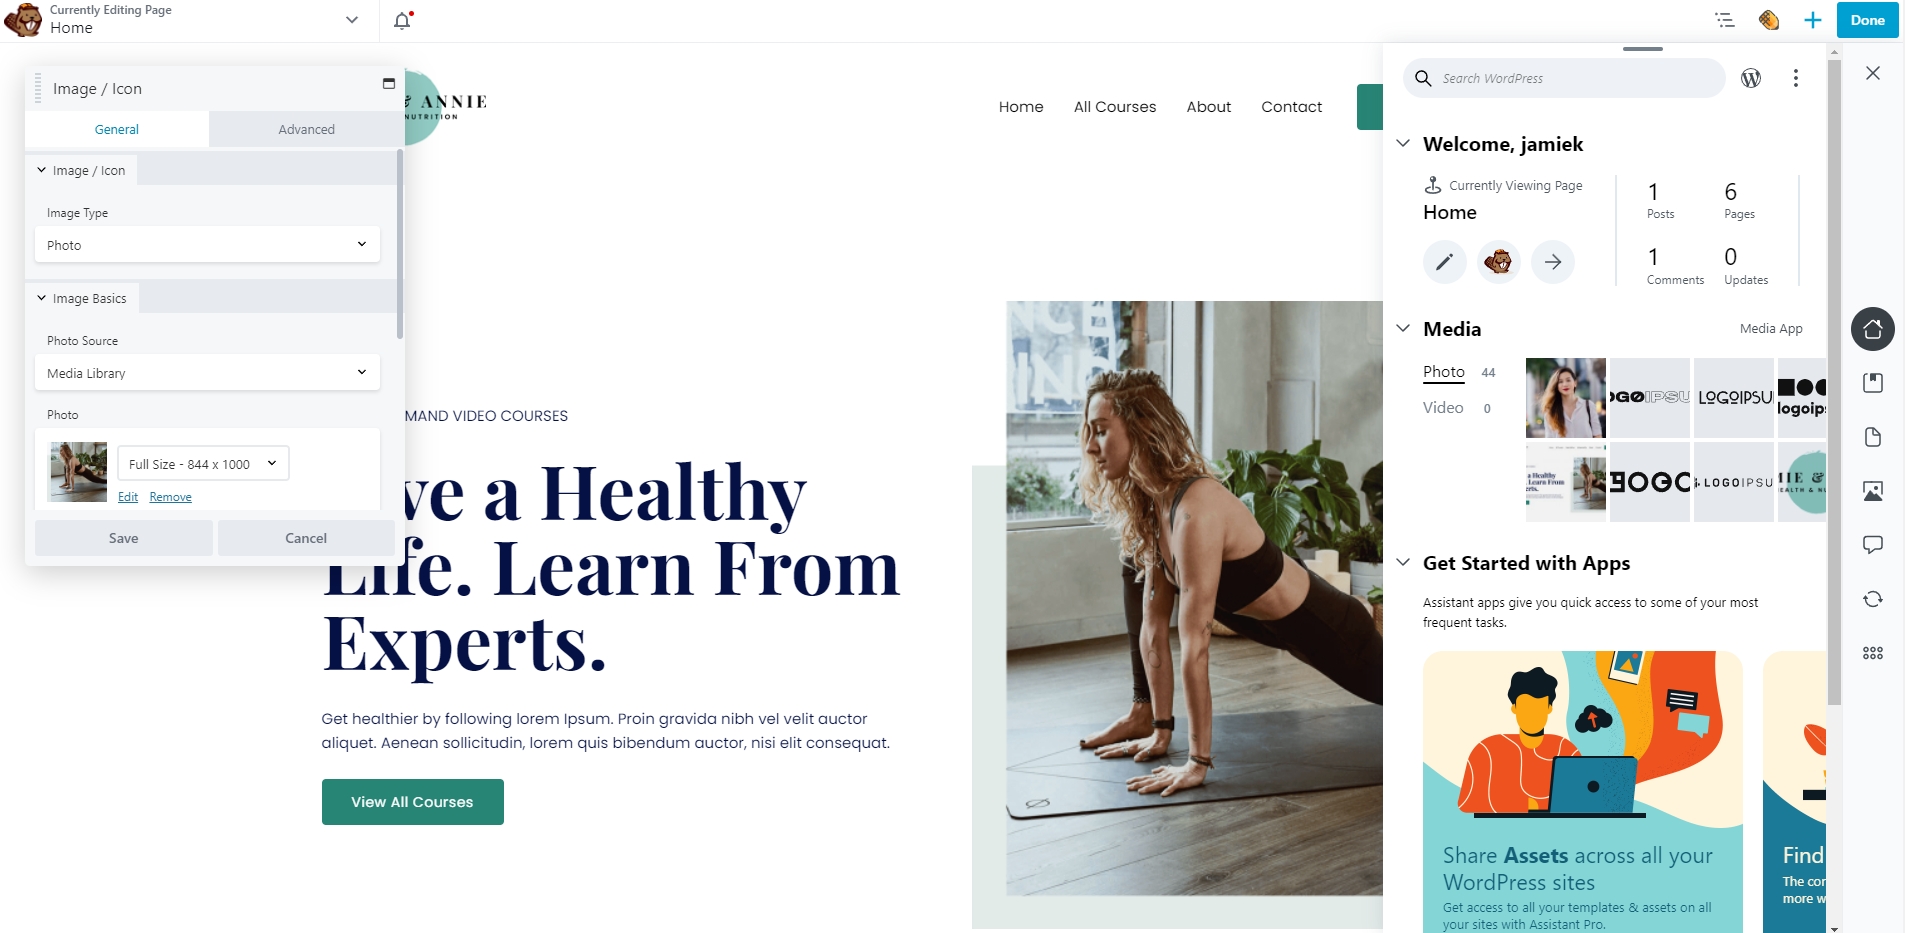
This is where you get to see the Assistant.
You should see a slider on the right with a welcome message and some assets within the layer.
That’s the Beaver Builder Assistant!
Upgrading to Assistant Pro
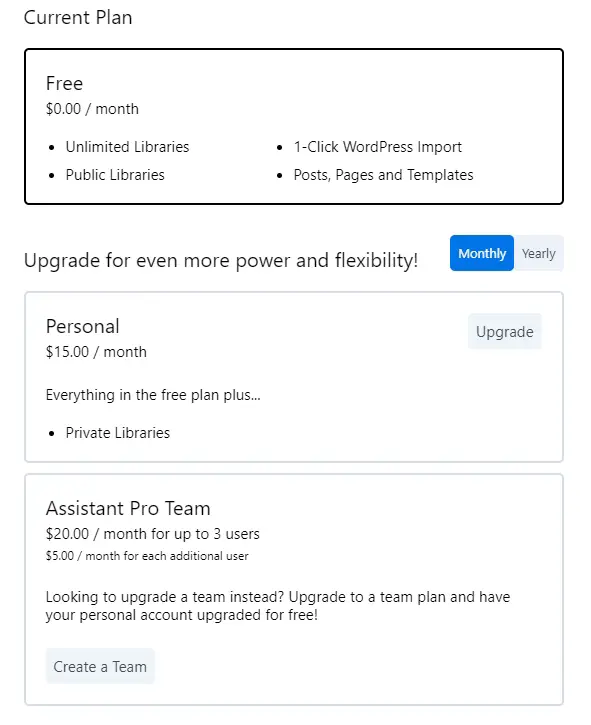
Upgrading to Assistant Pro is simple. It costs money of course, but is a simple upgrade process that unlocks core features within the plugin.
- Select the Libraries option within the Assistant slider
- Select the orange Connect to Pro option
- Sign in or sign up on the Assistant website
- Select the orange Upgrade option at the top right of the screen
- Select your plan from the options and pay
Once payment is complete, your account will automatically be upgraded to Pro and you’ll get access to the premium options like private files.
The only slight annoyance is that selecting Connect to Pro will take you from the page you’re working on.
Make sure to save whatever you were doing before you decide to upgrade!
Using the Product
Now everything is set up, you can explore and use Assistant Pro however you like.
All commands are available in that slider on the right, including the new libraries option and the assets you have already shared with the app.
From here, you can open a page, either with Beaver Builder or another page builder and begin working.
Managing assets
One of the key strengths of Assistant Pro is the ability to share and manage assets across a team.
We’ll use an image as an example here but it’s the same process for any type of asset.
To upload an image:
- Select the Libraries option within Assistant Pro
- Select the black ‘+’ icon that looks like the block editor icon
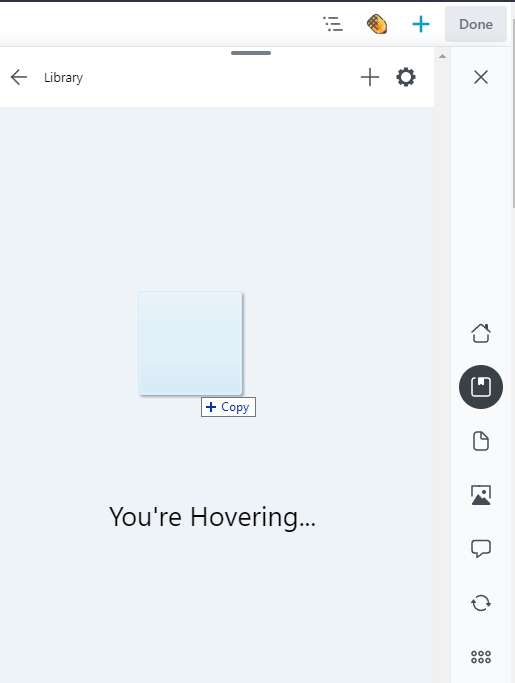
- Drag and drop an asset from your device into the Library window and you should see a ‘You’re Hovering’ message
- Drop the asset and it will be imported into your library and will appear in the window
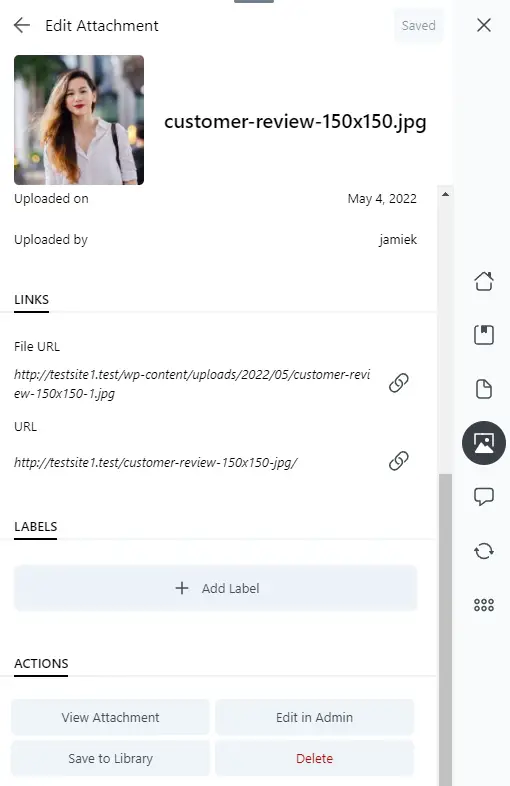
You can perform minor edits within Assistant Pro like changing asset titles, adding alt text and descriptions.
If you select an asset and scroll down the Assistant Pro window, you’ll see an actions panel. From here you can view, edit, save and delete that individual asset.
To use an image within a design:
- Select the image you uploaded to Assistant Pro
- Select the Import button and you should see ‘Item Imported’ once complete
- Open the page or post with Beaver Builder or other page builder and add the image in the usual way
It’s here I think Assistant Pro misses a trick. Importing the asset is easy and can be performed from within the app.
However, to use that asset within a page, you need to use your page builder or the block editor.
That’s only marginally more efficient than uploading the asset using the standard WordPress importer.
It would have been much easier if Assistant Pro could interact with your page builder and you could drag and drop it into place directly.
Even if you use Beaver Builder, you have to edit the page and import the asset using standard tools.
That’s a real shame. Not a showstopper to be sure, but a missed opportunity.
There may be a technical reason for this beyond my understanding, but as a user and someone who designs pages all the time, this is a real missed opportunity.
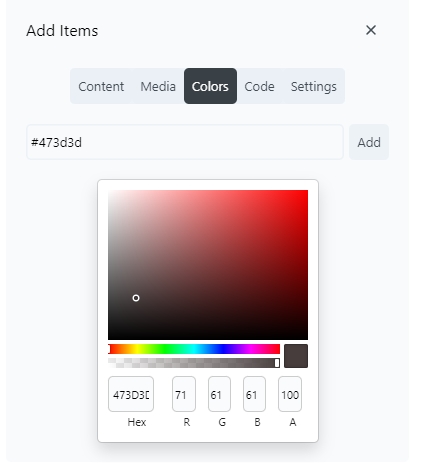
Creating sidewide colors
I don’t know about you, but having to copy and paste hex codes into Notepad++ and then copy and paste them into pages can be a real drag.
That’s something Assistant Pro can help with.
It has a neat color management option that allows you to create color swatches within the app so you can refer to them and use them throughout the site.
This is definitely a time saver!
- Open Assistant Pro and select the Libraries option on the right
- Select your library or create a new library
- Select Colors from the Add Items section at the top of the window
- Select the color or enter a hex code in the window
- Adjust as required and select Add to save the setting

From now on within that project, you can select that color directly from your library to use anywhere you need.
This not only saves time but helps you maintain complete brand identity throughout a project.
This, in my mind, is one of the more useful tools within Assistant Pro.
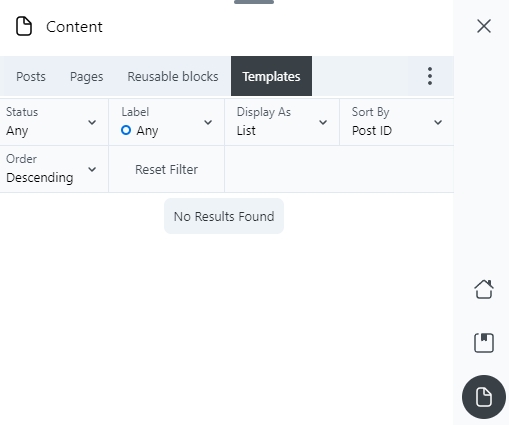
Saving and reusing templates
Another useful trick up Assistant Pro’s sleeve is the ability to reuse templates across a website.
If you have ever used block templates or block patterns in WordPress, this is a similar process.
For example, you could create a call to action banner for the site and save it as a template. Then, you can use it across the site by simply importing it and dragging it into place.
It’s a huge timesaver and something we do all the time.
If you use Beaver Builder as your page builder, you can do the same with the help of Assistant Pro.
Beaver Builder already has the option to use templates, Assistant Pro can help with that.
In the same way you upload an image, video or other asset, you can create a section template or page template and share it in your Assistant Pro library.
You can then select it from within Assistant Pro like you would any other asset for use in the design.
There are lots more features to Assistant Pro but those are the ones we spent the most time with and therefore, have the most opinion about.
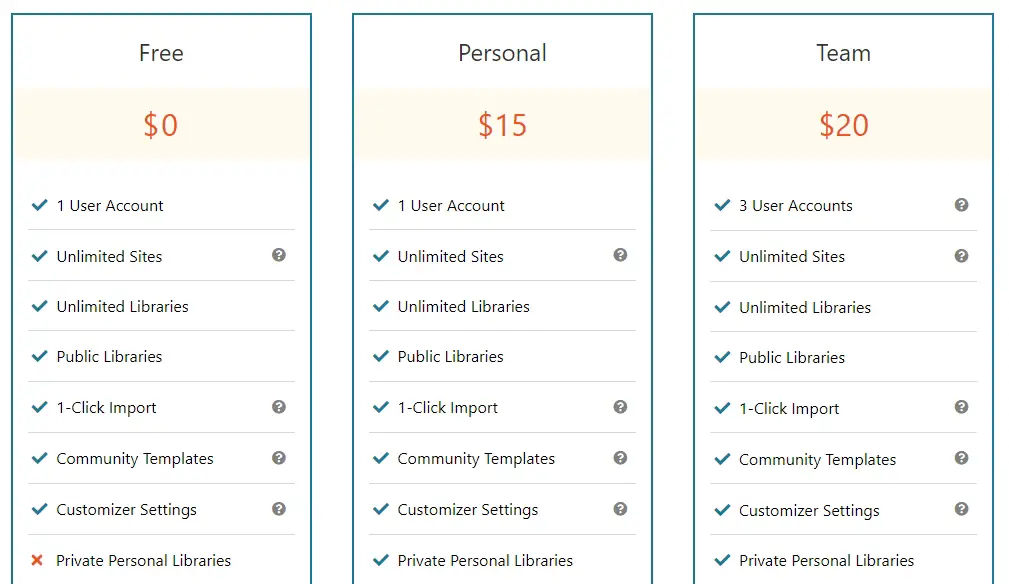
Assistant Pro Pricing
Assistant Pro comes with a free plan, Assistant and a premium plan, Assistant Pro.
The free version gives you all the tools within the plugin to use without restriction.
However, anything you upload will be public and available from within the community.
If you need to keep content private for a project, you’ll need to pay.
There are two pricing plans, Personal and Assistant Pro Team.
The Personal plan includes the option for private libraries and costs $15 per month
Assistant Pro Team enables you to create distinct teams for projects and costs $20 per month for the first user and $5 per month for up to 3 users.
That’s not the cheapest product out there, but when compared to something like Dropbox, it's not expensive either.
The only nag is that it is a subscription, $15 per month is a lot considering the price of other plugins and development tools. And, what get for that is the ability to keep your assets private or create teams.
Is it a good price for privacy? We would say - yes, yes it is. This is your bread and better, so why risk it for a measly 15 bucks?
Now let’s outline the pros and cons.
PROs
Here are what we think are the high points of Assistant Pro.
Easy to use – The plugin is simple to install and upgrading is equally simple. Once done, as soon as you figure out you don’t see Assistant Pro from the back end, only the front end, you’re good to go.
Intuitive controls – Everything is designed in typical Beaver Builder style. Instructions are clear, menus and controls are logical and most controls are where you expect them to be. There are dialogs for everything and even the ‘You’re Hovering’ type messages are useful.
Collaboration made easy – While Assistant Pro isn’t revolutionary by any means, it definitely helps save time and effort. It simplifies some often annoying processes and enables teams to collaborate and share assets. We didn’t use the comment feature, but if it works as well as other tools, that’s a real bonus.
Compatible with other page builders – It would have been easy to keep Assistant Pro to itself but the Beaver Builder team made sure it was compatible with other page builders too. That’s great for Elementor users or block editor users and a smart move.
Right tool at the right time – If ever there was a time for a collaboration tool, it’s now. With more people working from home, freelancing or starting their own distributed agencies, tools like this deliver the right tools at the right time.
CONs
There are a few downsides to Assistant Pro through.
No drag and drop option – It’s a shame that you cannot upload an asset to Assistant Pro and drag it from there to the page. You can’t do it even if you use Beaver Builder, which is a genuine shame. This makes it only a little more useful than cloud storage as you still have to import in the normal way.
Navigation niggles – Some commands take you out of the page you’re working on. This means you have to go back, save your changes or publish the page, select the option again and be taken away from the page. While there aren’t many controls like this, they are there and they are annoying.
Free version shares your assets – There are many ways to ‘encourage’ people to upgrade to premium, but not allowing you to keep your own work private is not one of them. If you want to keep your own work private, you have to pay. Not a good move when privacy is such a hot topic.
It’s not too cheap – Charging $15 per month for a tool is aspirational to say the least. Especially when privacy is the major benefit.
Testimonials
As Assistant Pro is new, there aren’t that many testimonials for it.
We did find one from WPLift and they had the same impression as we did.
“Even if you are a freelancer or developer creating websites for clients, Assistant Pro can help you streamline many tasks. This way, you will have more time for essential tasks rather than downloading and uploading files.”
Assistant Pro FAQs
We have tried to cover most of what we tried with Assistant Pro but here are some answers to common questions.
What is Assistant Pro?
Assistant Pro is a WordPress plugin that seeks to help you build websites more efficiently. It has a range of tools designed to help with common tasks such as sharing assets within a project, minor editing tasks, setting brand colors throughout a design, importing and sharing templates and commenting on designs.
Is Assistant Pro worth paying for?
Whether Assistant Pro is worth paying for or not depends entirely on your needs. As far as our own time with Assistant Pro has shown us, you don’t get more tools with premium, you just get private storage. So, if you need to keep your assets private or don’t want to share, you’ll have to pay.
Can anyone use Assistant Pro?
Yes, anyone can use Assistant Pro. It is primarily for web developers and designers but anyone can use the plugin. The free version installs the same as any other plugin and you don’t necessarily need to pay to use it. Some of the tools, like saving colors and using templates between pages could be useful for anyone!
Wrapping Up
We like Assistant Pro. While it isn’t going to transform the way you work or suddenly make web design easier, it does have definite benefits.
It’s easy to use. You can easily upload assets, add alt text if you forgot, edit within WordPress and make minor changes.
Designers can upload assets into the library and you can then select them to use within the design.
You can add comments, use comment status to keep a check on progress and perform minor project management tasks within the app.
It isn’t going to set the world of web design on fire but as a useful plugin with some quite useful features, it definitely delivers!
